
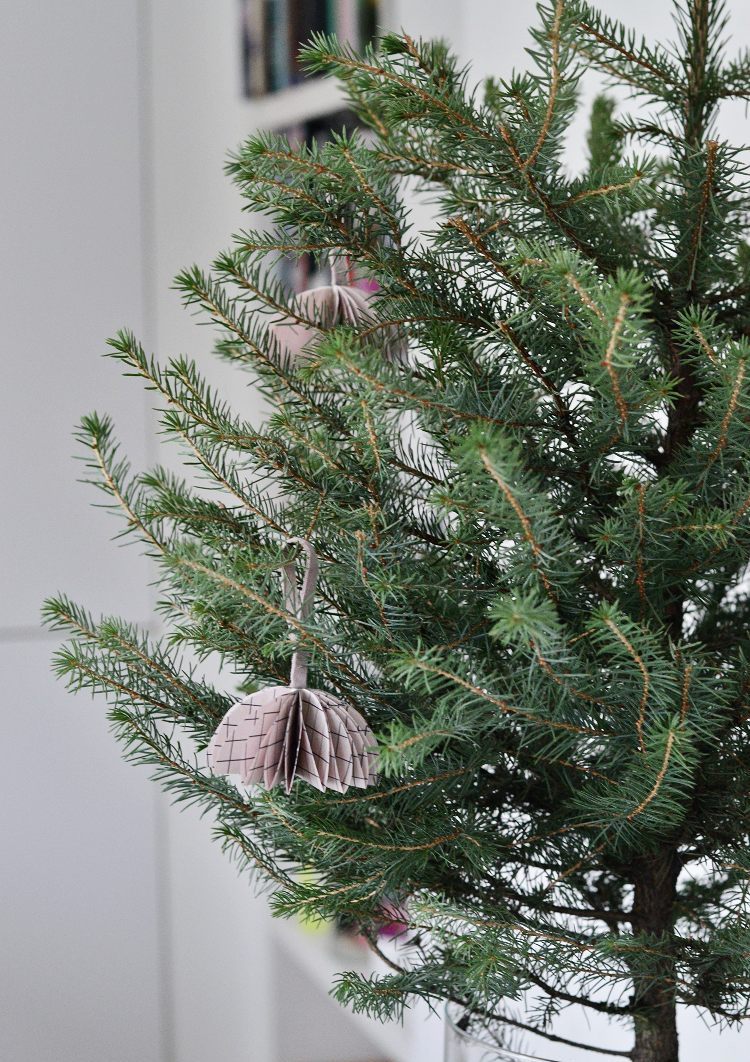
It’s always fun to hand make some of your Christmas decorations each year. One day I’d love to make all my decorations but for now, a few will do. I’ve recently been loving all the possibilities of creating with paper. Something as basic as paper has so many possibilities and so I decided to make some DIY paper tree ornaments using just printer paper.
I went for a ‘dirty’ blush tone as I wanted a touch of soft color but not too much. These baubles are inspired by flowers as you can see and I chose simple graphic patterns to finish the design. You can make your own patterns or you can download my patterns for free below.
While I’m using these as tree ornaments, they would look great as gift toppers too. You can make them as per the tutorial but leave out the ribbon. Match the wrapping paper to the colour of the baubles and you’ll have some minimally stylish gift wrap!

DIY paper tree ornaments
Materials:
double sided patterned paper (make your own or grab my free template below)
glue with precision tip (US readers find similar here)
narrow ribbon
The best way to follow the tutorial is to watch the video below where the steps will be very clear. Otherwise here’s a quick written step by step but it’s not nearly as easy to explain as it is to show:
1. cut out 8 circles – my circle diameter is approximately 3 inches/ 8 cms (you’ll get 6 circles per sheet of A4 or letter paper so you’ll need 2 sheets per ornament)
2. fold the circle in half and then half again
3. open it up and apply a very thin line of glue in the centre crease at the top of the circle going down just under a third of the way of the top half of the circle
4. fold the circle back in half to stick where you applied the glue
5. now apply glue to the top left quarter of the semi circle – start at the crease and go down a quarter of the way of the semi circle and then add more glue going left till the edge of the semi circle. So you’re essentially adding glue in a wide and short triangle shape
6. fold over and glue. make 8 of these for each ornament
7. now take one of the quarters and add a very thin line of glue as close to the straight edge as possible
8. take the next quarter and stick on to the quarter you just put glue on, making sure they are flush and aligned; continue doing this until you have glued all 8 quarters
9. cut a piece of ribbon approximately 22 cms/8.5 inches long – make sure the ribbon isn’t wider than the spine of the quarter circle. (if you don’t have narrow enough ribbon, cut your ribbon to size)
10. fold the ribbon in half and glue the ends together and then glue this on to the spine of the quarter circles – hold firmly in place and allow to dry
11. carefully open the flower and glue the top of the last two petals together – hold in place for a few minutes and leave to dry completely before handling
12. once dry you can fan out the ‘petals’ if they’re looking too stuck together
Here’s a video tutorial for making these DIY paper tree ornaments
As you can see, they’re pretty easy to make and you can make a whole bunch in an afternoon. As mentioned you can download my patterns or make your own. I have 3 free patterns for you – a grid pattern, a random sticks pattern and a tiny letters pattern. The letters are all Christmas wishes and phrases but they’re tiny so it looks more like a graphic pattern than letters.
You can also mix and match the patterns which looks pretty cool! I mixed the grid pattern with the letters one and because they’re such subtle patterns it totally works.


Will you make these paper ornaments? Remember, if you don’t want to make your own patterns, grab my free ones either above or below.

Maybe it’s also good to have a colorful and glittery paper tree ornament. i may try one day 🙂
Enjoy making it 🙂