Do you prefer a bath or shower?
I’m a shower kind’a gal most days but I do like to indulge in a hot, bubbly bath once in a while. The last time I indulged in a bath, I dropped my brand new book in to the water.
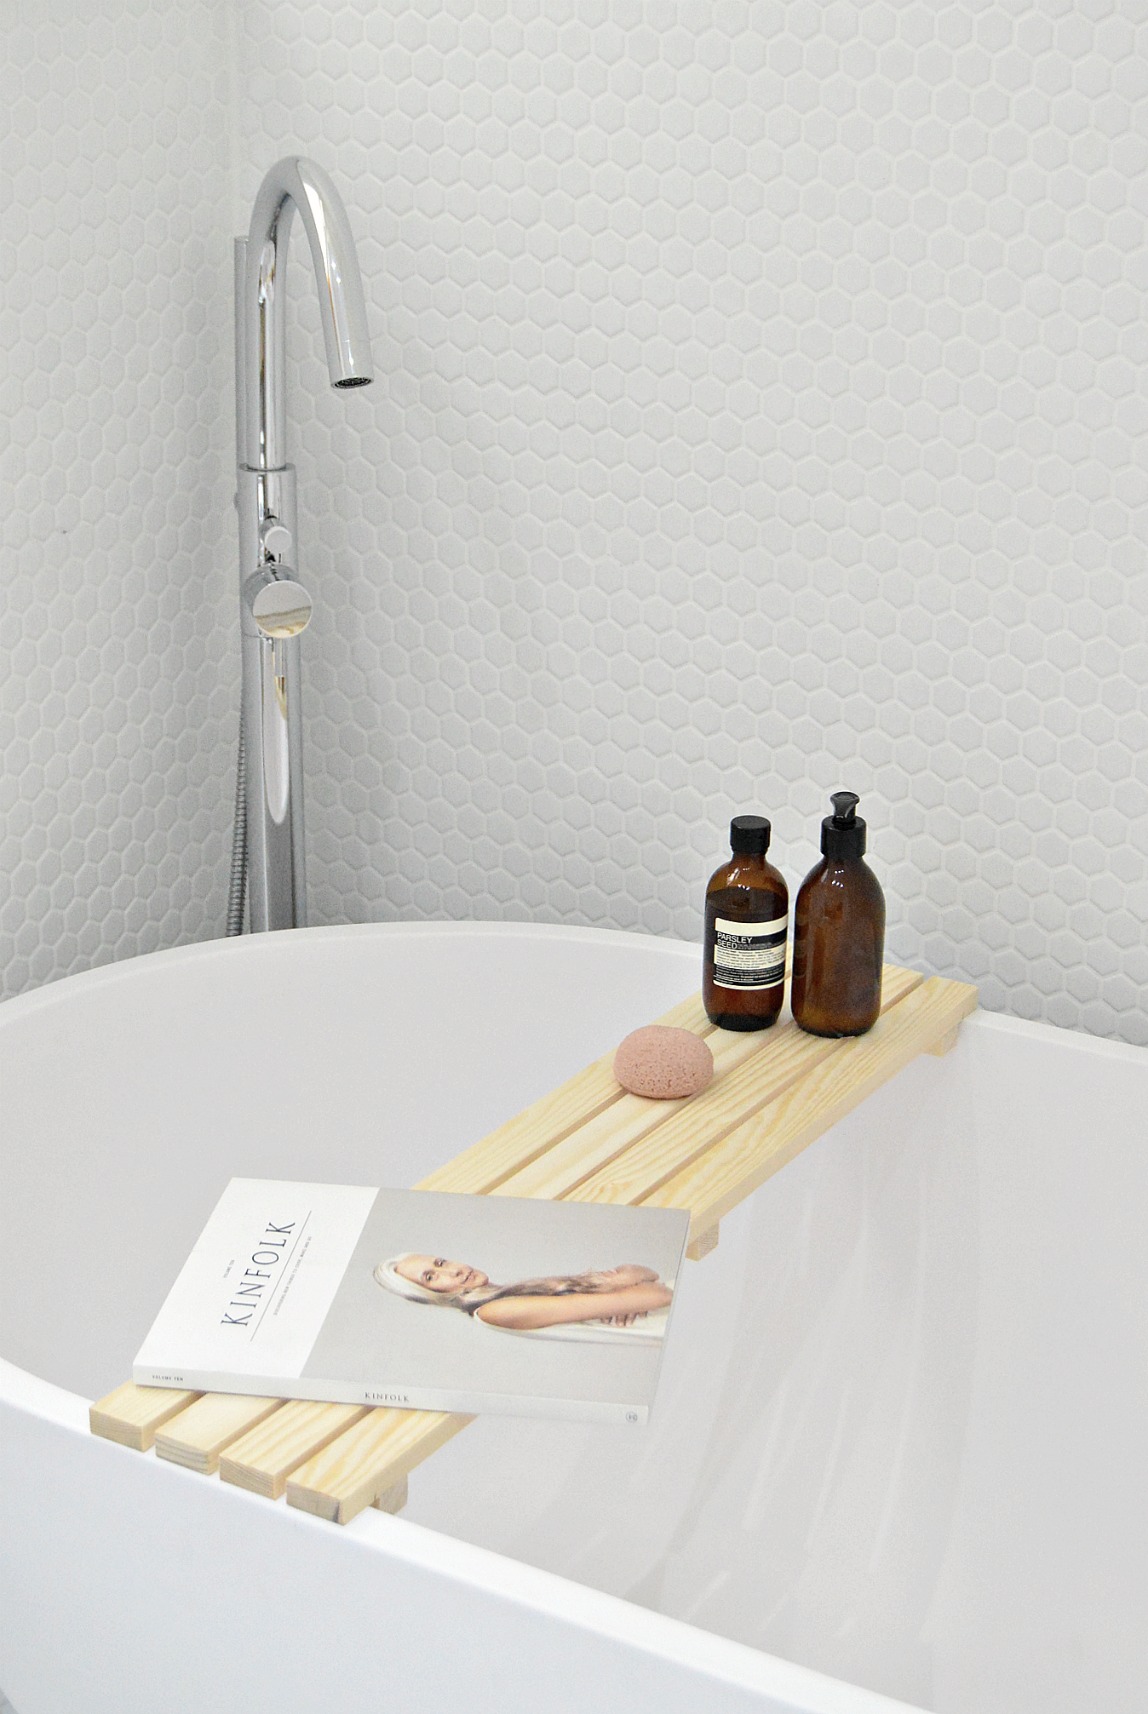
After the hissy fit that followed, I figured I needed a bathtub tray. Not only are they so handy to keep all your stuff on, but they look great in your bathroom too. So I made this diy wood bathtub tray that I’m sharing today.

DIY Wood Bathtub Tray
Materials:
4 x flat pine stripwood (900mm x 36mm x 15mm)*
1 x thicker pine stripwood (900mm x 25mm x 18mm – for the back of the tray)*
hand saw
sandpaper
strong wood glue
waterproof wood sealer
*These sizes were right for my bathtub so check your bathtub width to be sure they’ll work for you too.

Cut the 4 flat pinewood strips so they go across your bath and sit neatly on the rim of your bath. My bath is 76 cms wide so thats the length I cut my strips down to.
Sand down the ends you’ve cut to make them smooth.
Next, cut the thicker pinewood strip in to 3 pieces.
Each piece should measure the width of the flat pine strips which is 36mm (for mine) plus an extra 6mm for each of the three gaps – for the slatted look. So each piece will be 162mm.
Once cut, sand the cut edges to smoothen.
Glue the 3 thicker pinewood pieces that you’ve just cut to the underside of the tray to secure the slats in place.
The 2 end pieces will sit just inside the rim of your bathtub. The third piece will be glued to the middle of the bath tray for extra sturdiness.
Let dry for 24 hours (or however long your wood glue says)
Varnish the bath tray with waterproof wood sealer, let dry and it’s ready to use.


I’m wondering why I didn’t think of making one of these bath trays before? Instead of fumbling around with chairs or stools next to the bath, that I can barely reach, this is so much handier. Perfect place to perch that all important glass of bubbles too!
P.S. Is you bathroom the calm and dreamy space that it can be? If not, here are some tips on creating a clutter free bathroom that will help transform your space.

[…] I have no storage around the bath, I made a simple wooden bath tray which is handy to keep stuff on when in the bath. And finally I added a rubber plant because I […]