Where did this year go? I’m starting to look to 2017 and that means planning and thinking about my goals. Do you set goals each year? I used to make resolutions but I’ve found that goal setting with a strong action plan is far more realistic and achievable.
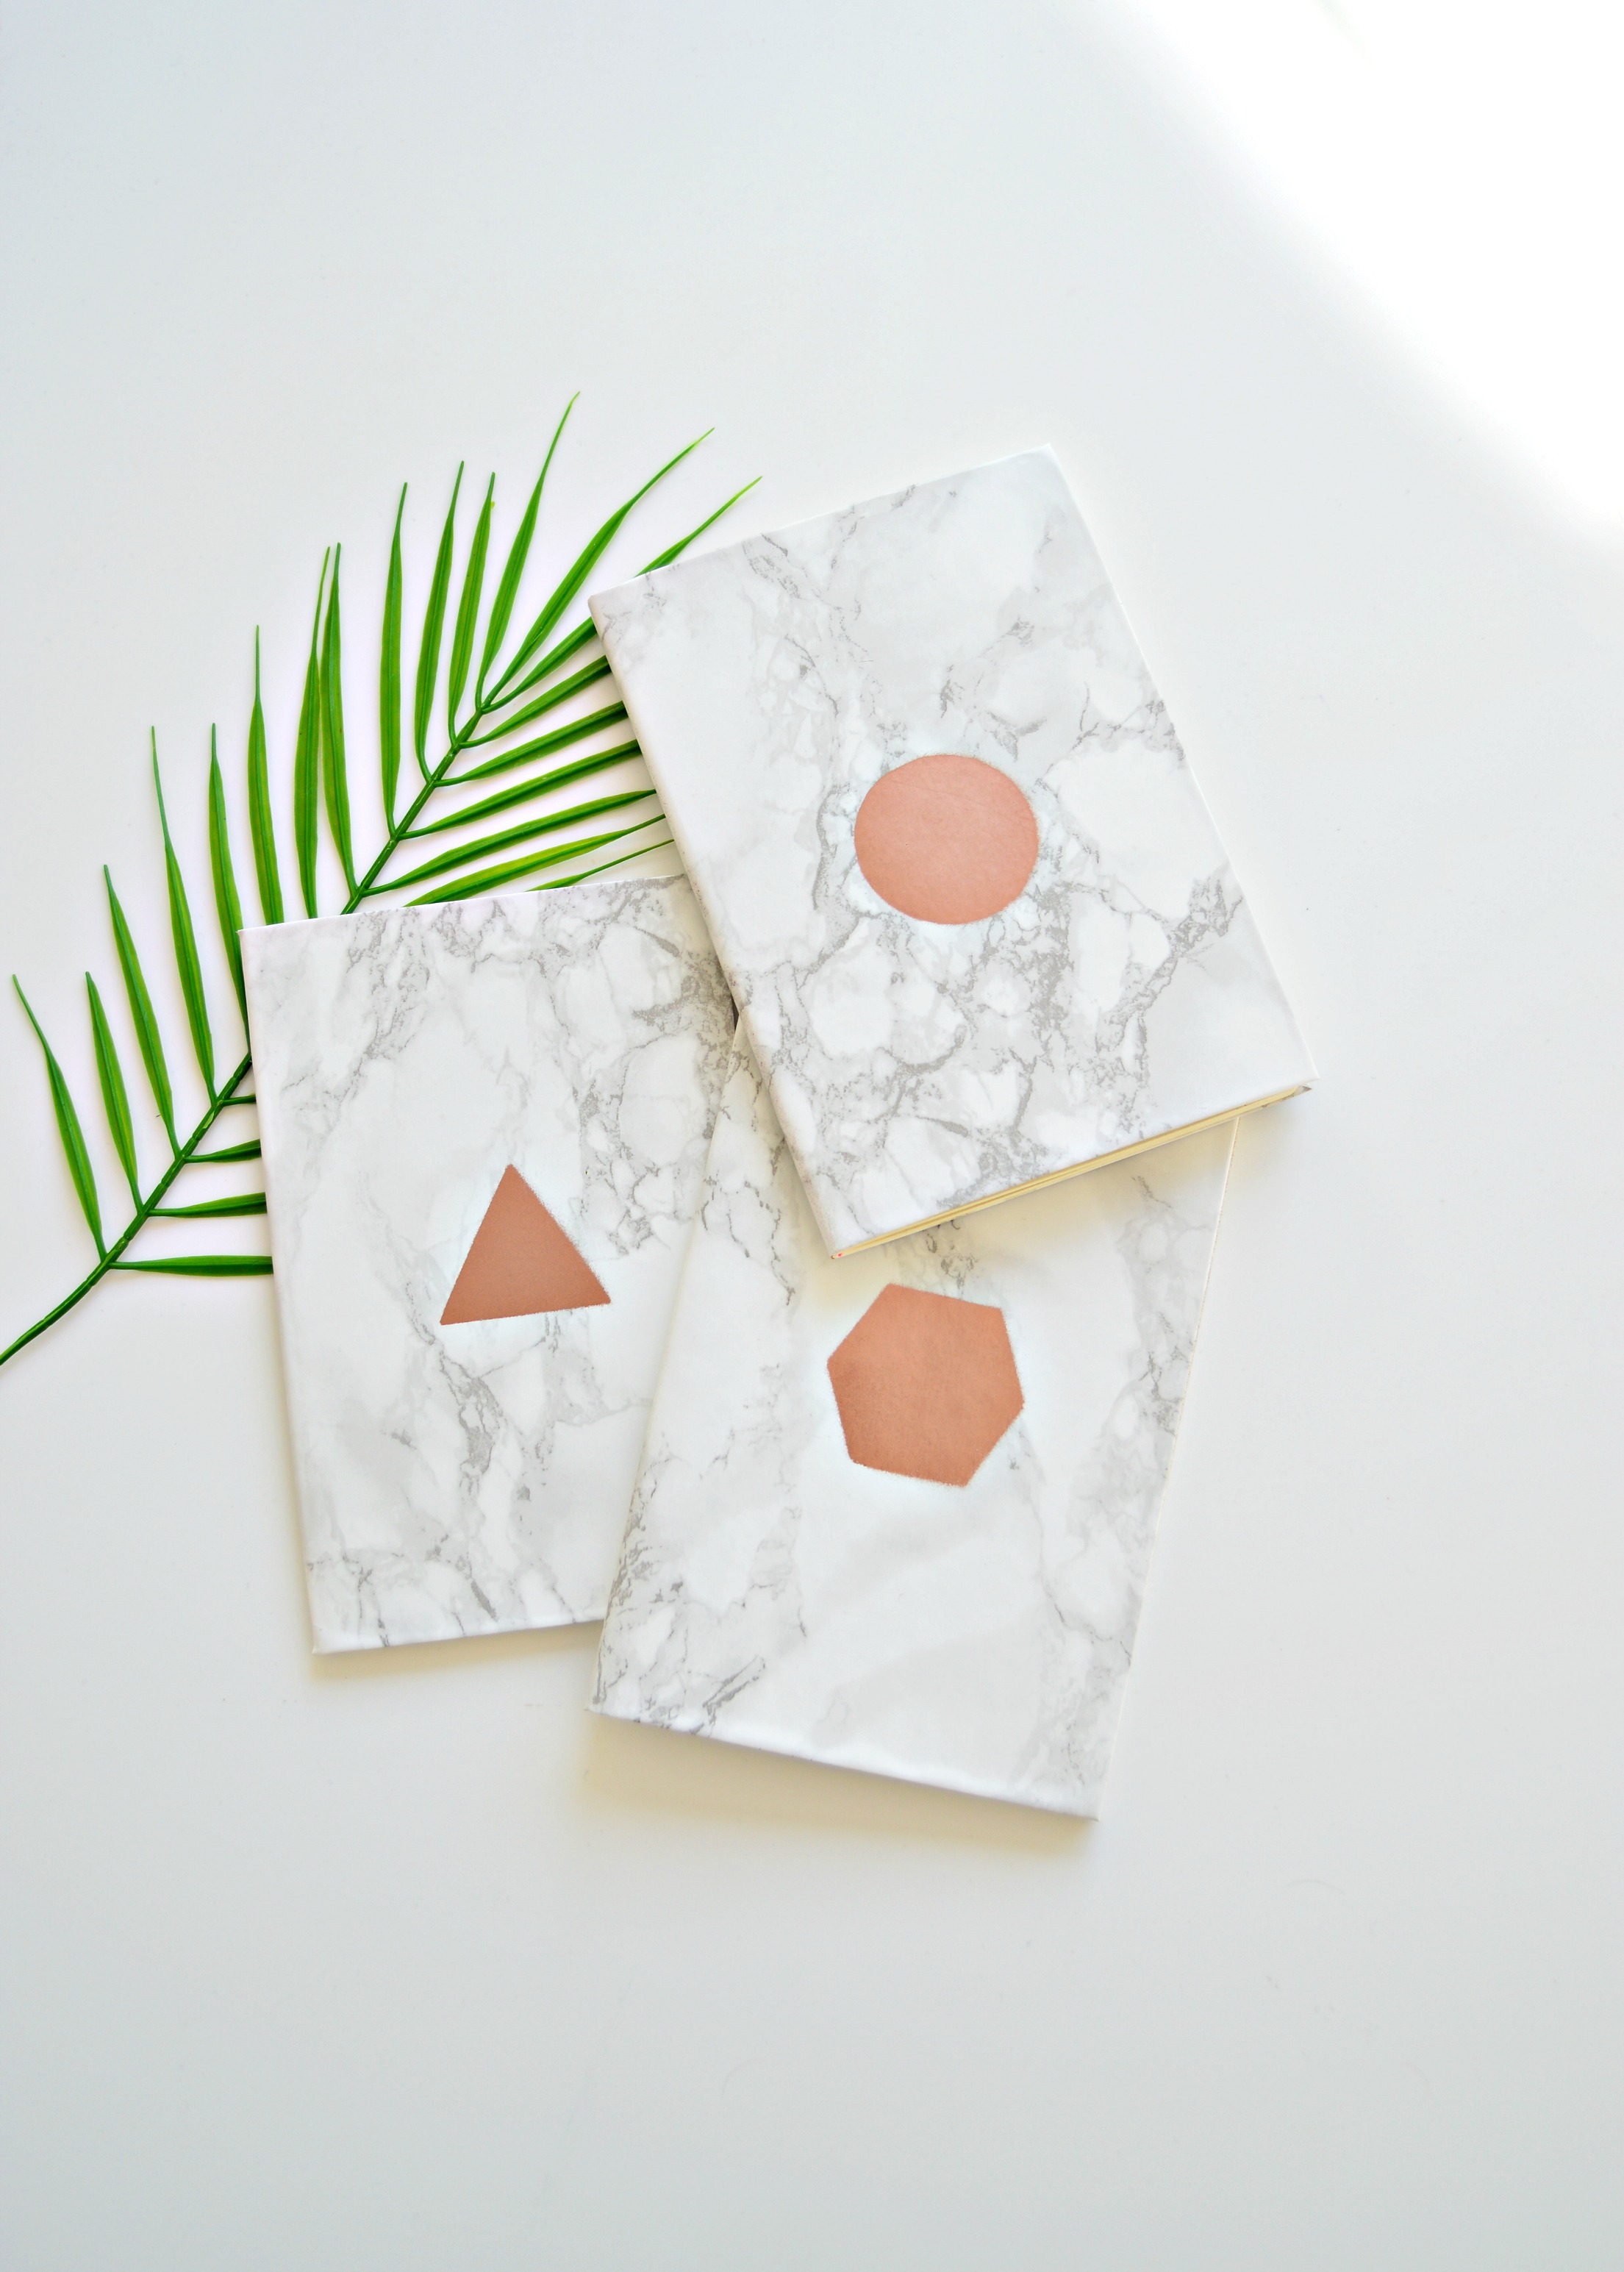
I tend to encourage myself to set goals by buying pretty notebooks because as everybody knows, you should always, always write down your goals. But we don’t always do it, right? I know I put it off so this year to encourage myself even more, I thought I would customise some basic brown notebooks and decided to make this marble notebook DIY. If I’ve made them, I’m much more likely to use them.
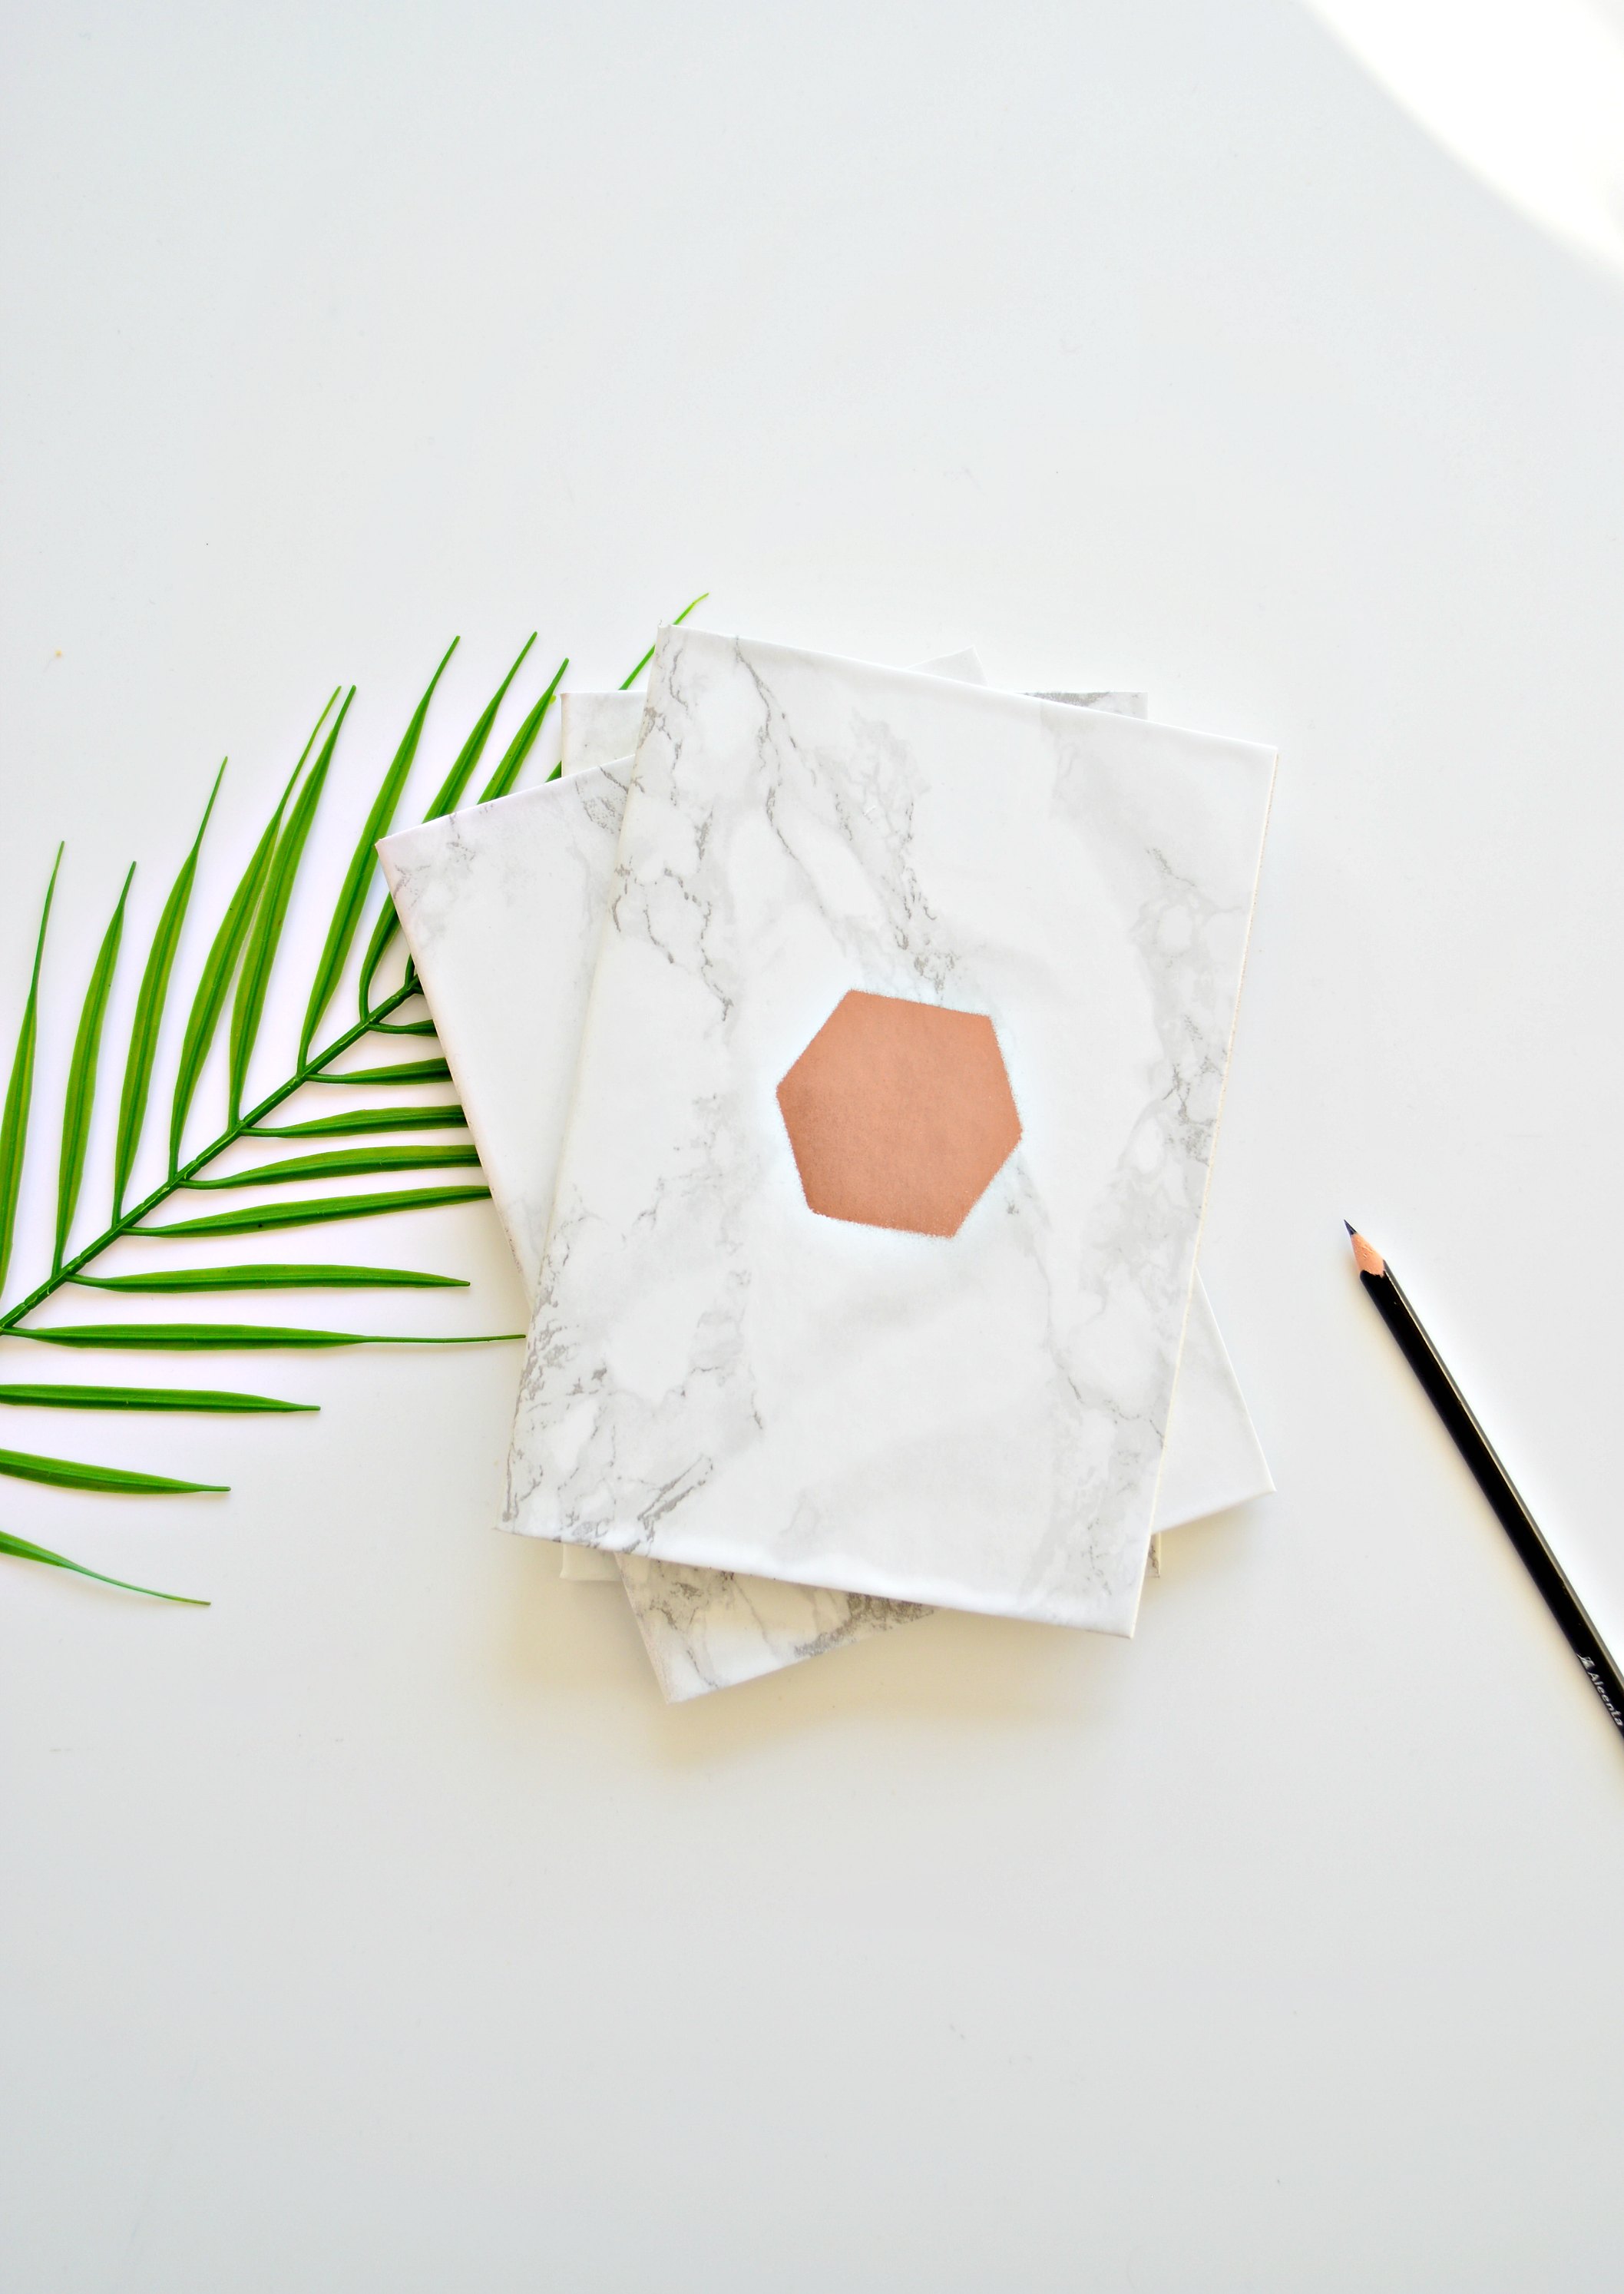
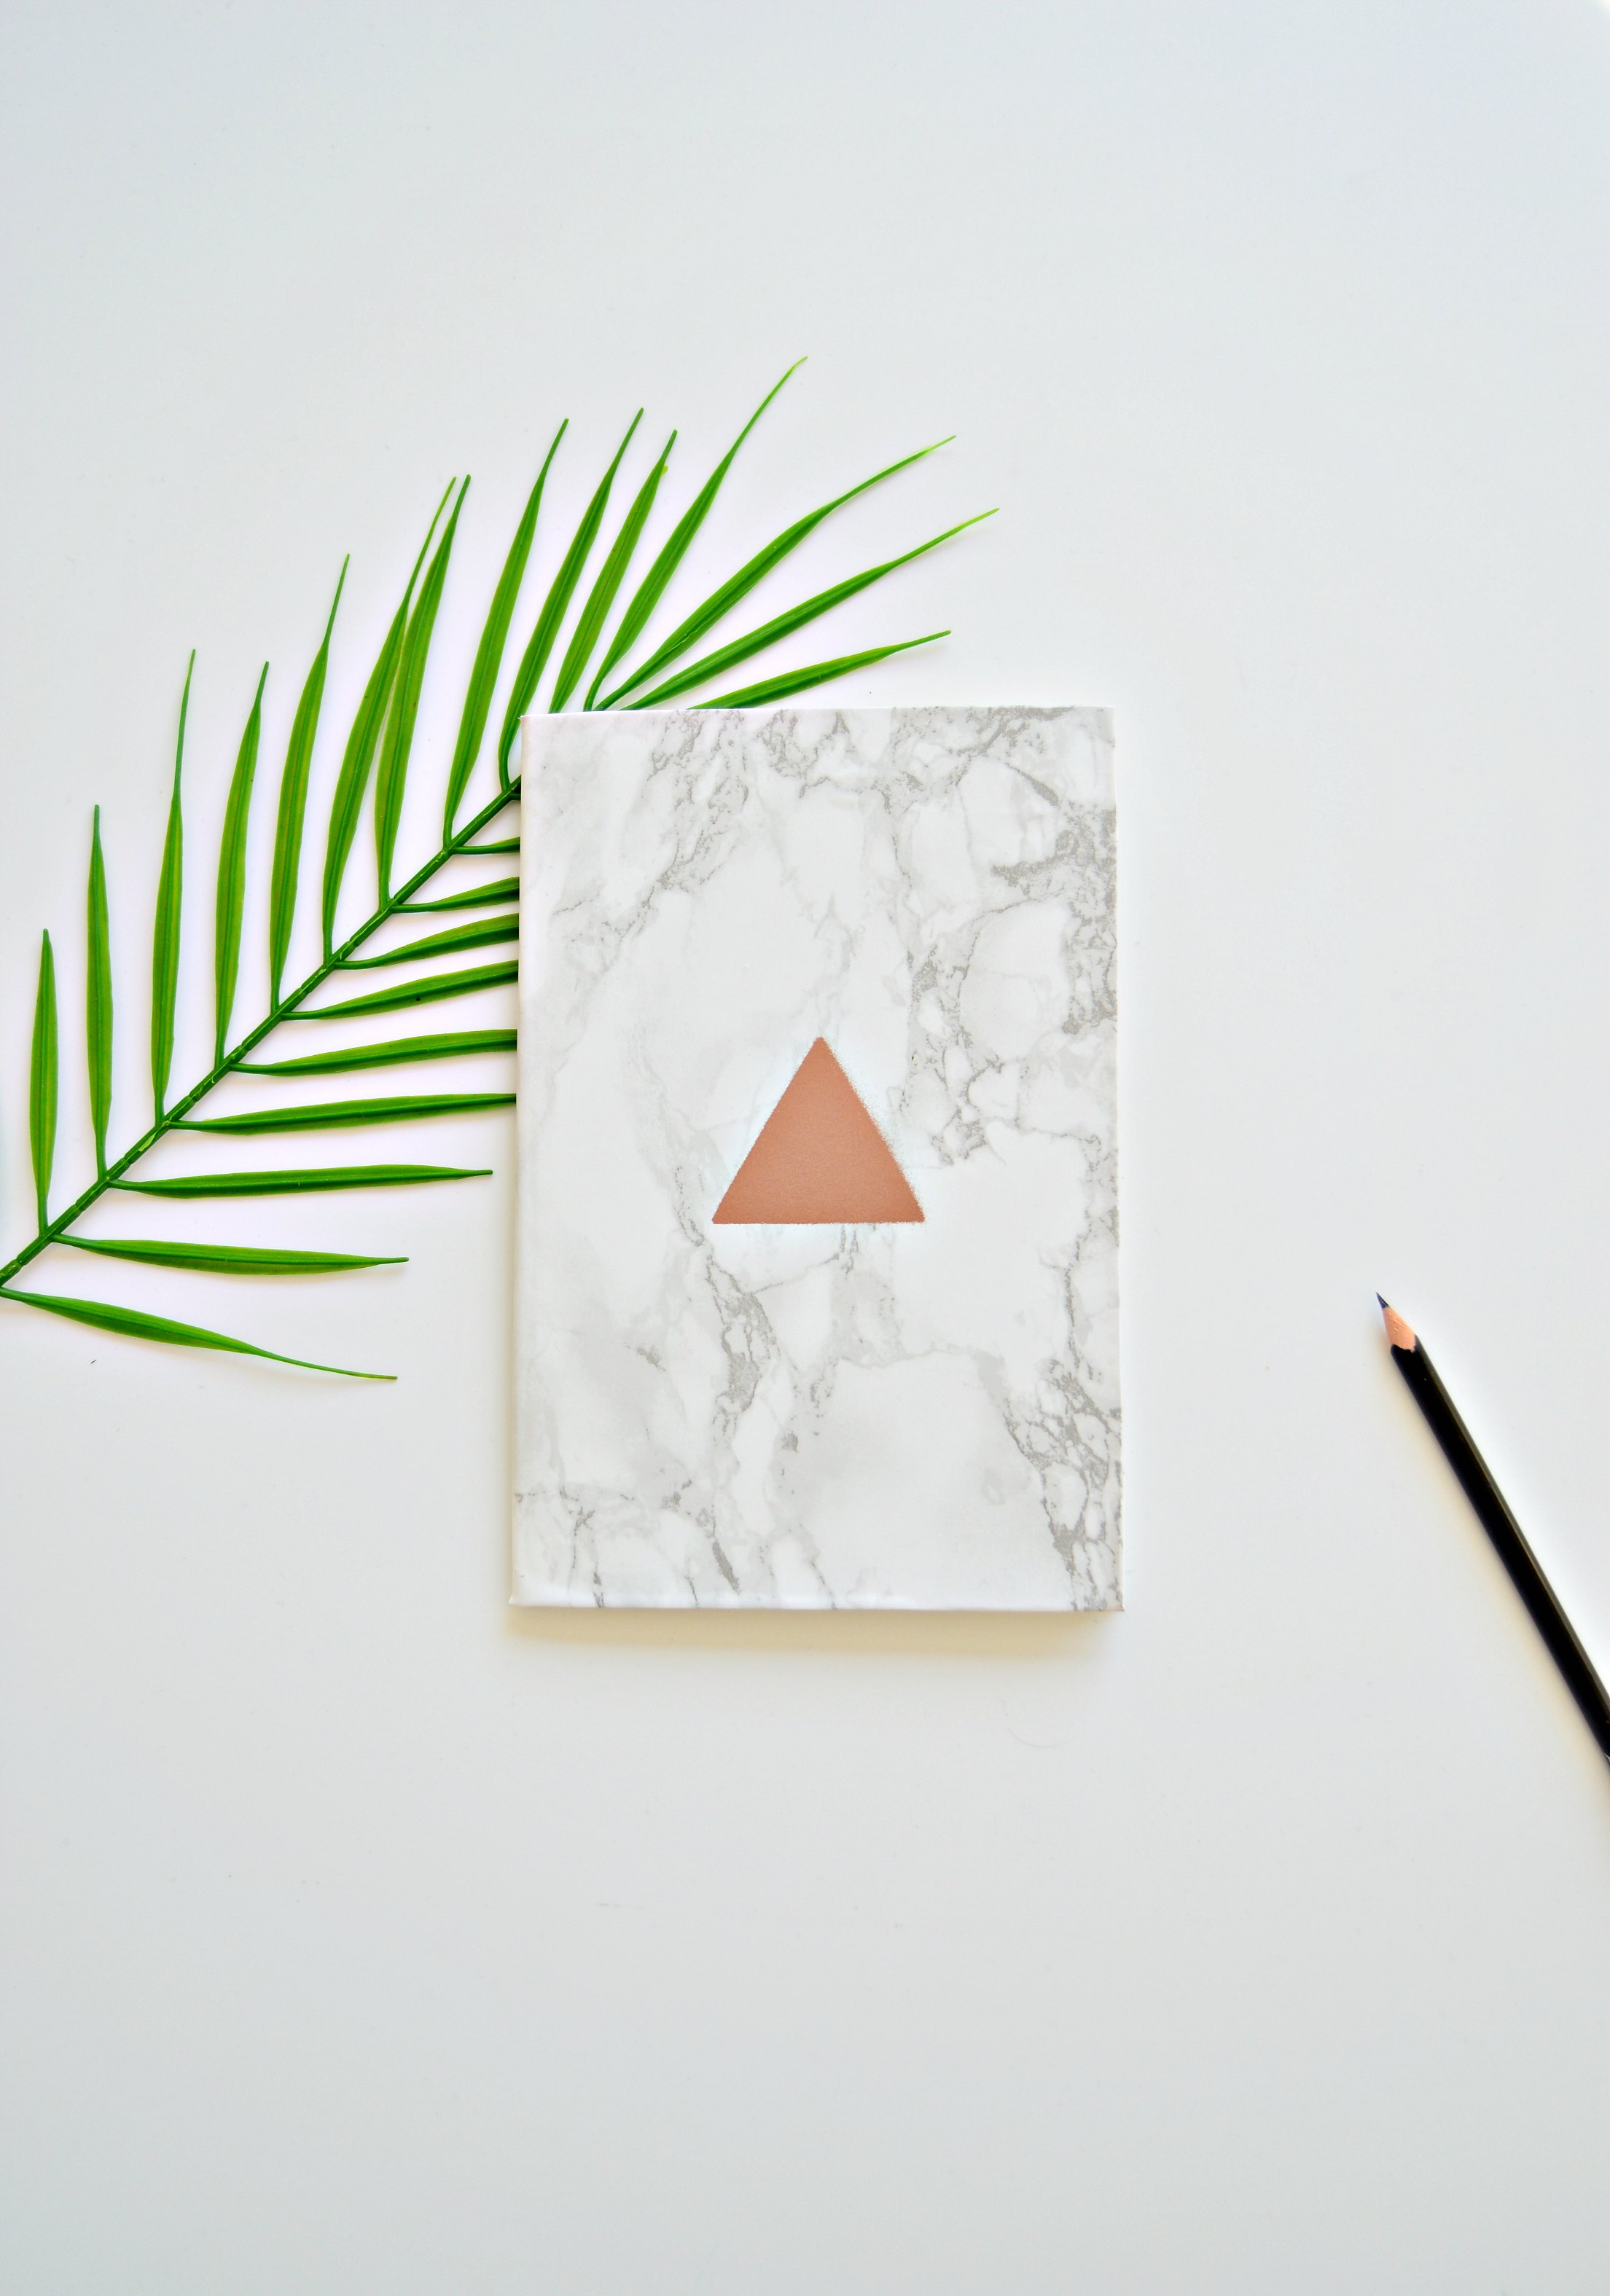
To some of you, this post may seem a bit early for goal setting but I’ve found that if you wait till late December like I used to, life always gets in the way. Doing it in November means it will get done and then you can review and add action steps as and when you have time over the next 6 weeks. Come January, you’ll have a set of goals with an action plan to help you make your dreams a reality. If you want some stylish notebooks for your new year goals then this marble notebook DIY is for you. I’ve added some graphic copper shapes too because marble and copper are a match made in heaven! Here’s how to make them.

Materials:
basic notebooks
marble contact paper (UK readers find it here)
copper spray (UK readers find it here)
scissors, ruler and pencil
Craft/utility knife
White card
Washi tape or crafting tape
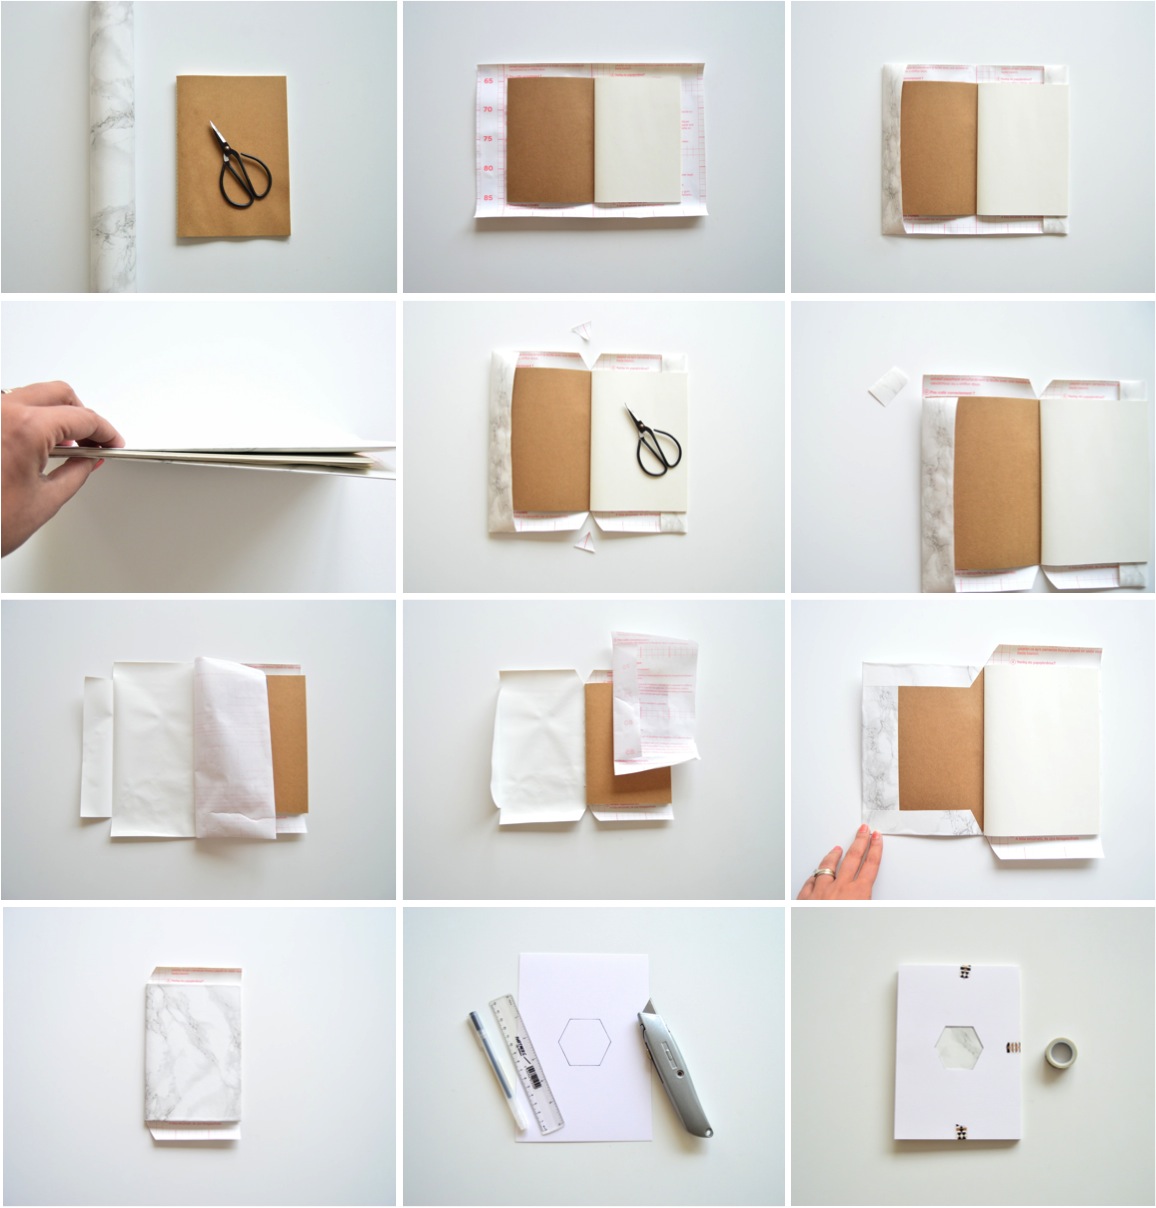
Start by covering your notebooks in the following steps:
1. Lay notebook flat on sticky-back paper. Cut a piece of sticky-back paper a bit larger than the size of the notebook. You want to have an extra 1.5-2 inches on all sides.
2. Fold down the ends of the front and back cover, making sure you have a defined crease. You’ll need to close the notebook when doing this to ensure it closes without any tightness later.
3. Then cut a little triangle off the sticky-back paper in the centre of the notebook, both top and bottom.
4. Next, cut off the extra bit of sticky back paper at the 4 corners – this will avoid overlap later.
5. Now peel your contact paper – I prefer to peel half, stick down the front cover and then move on to the back cover.
6. As you’re sticking the paper, smooth it out to make sure you get rid of any bubbles.
7. Once you’ve done the front cover, do the same on the back cover.
Once your marble notebook is ready, you need to cut a piece of card that is slightly larger than your notebook. Draw and cut out your chosen shape on this card, using your craft/utility knife and ruler (except for the circle where of course you can’t use a ruler). Tape this card very securely on to the notebook – I used washi tape but any craft masking tape will do. Tape down the edges and I doubled up some tape and stuck it under the card to make sure it was as secure as possible without any gaps. If any part of your notebook is not covered with the card, make sure to cover it to prevent any spray paint going on there. Spray and leave to dry.
The new year brings a lot of excitement as it always feels like a fresh start. I love to dream about all that I will achieve and do but I also know dreaming isn’t enough. You need to write down those goals with action plans. So I can’t wait to get goal-setting in my new copper and marble notebooks. Do you set goals? Do you think you’ll give this marble notebook DIY a go?

So so stunning! x
Thank you lovely lady xx