
Rainbows bring a smile to everyone’s face. They’ve been popping up everywhere as a symbol for hope during the pandemic.
I’ve been wanting to create a rainbow craft for a while and I recently came up with these DIY clay coasters inspired by rainbows of course. I thought they would make an especially thoughtful gift for anyone who needs a bit of hope this Christmas.
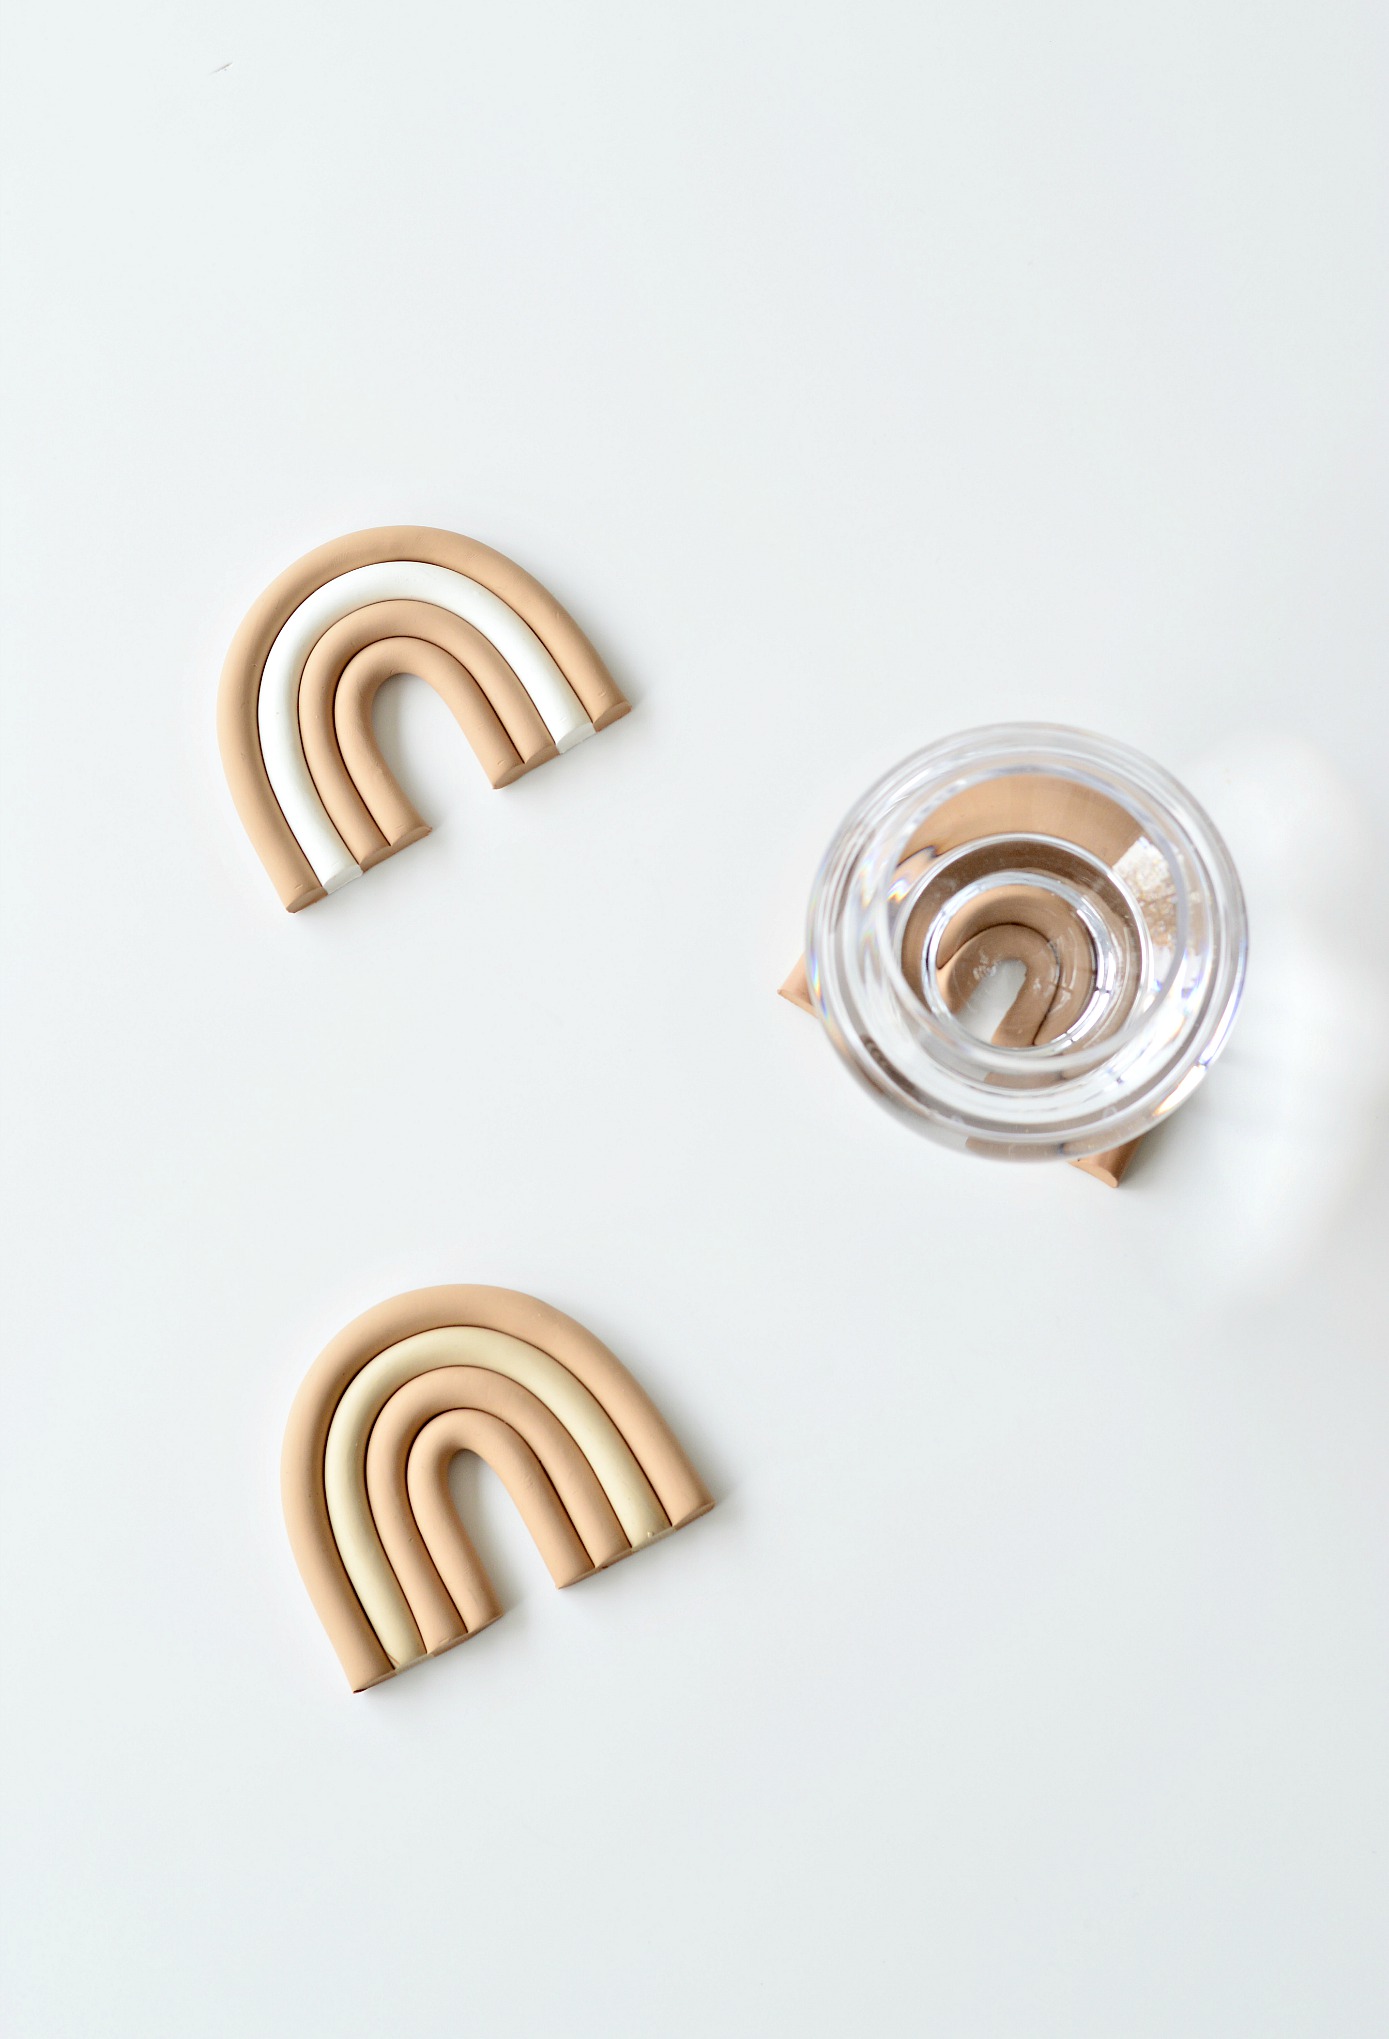
These DIY clay coasters are easy to make and look super cute. You can play around with the colours to suit any decor. They turned out better than I expected which is why I love them as a handmade Xmas gift because even thought they’re a DIY gift, they don’t look like it.

How to make Rainbow inspired DIY clay coasters
Materials:
polymer clay – US readers find it here (approx 1 x 2oz/57g pack per coaster)
metal ruler (or sharp long knife)
fine sandpaper
Colours: tan, hazelnut, white and sahara (sahara was from a different brand of clay which US readers can find here and UK readers here) You can of course use any colours you like.
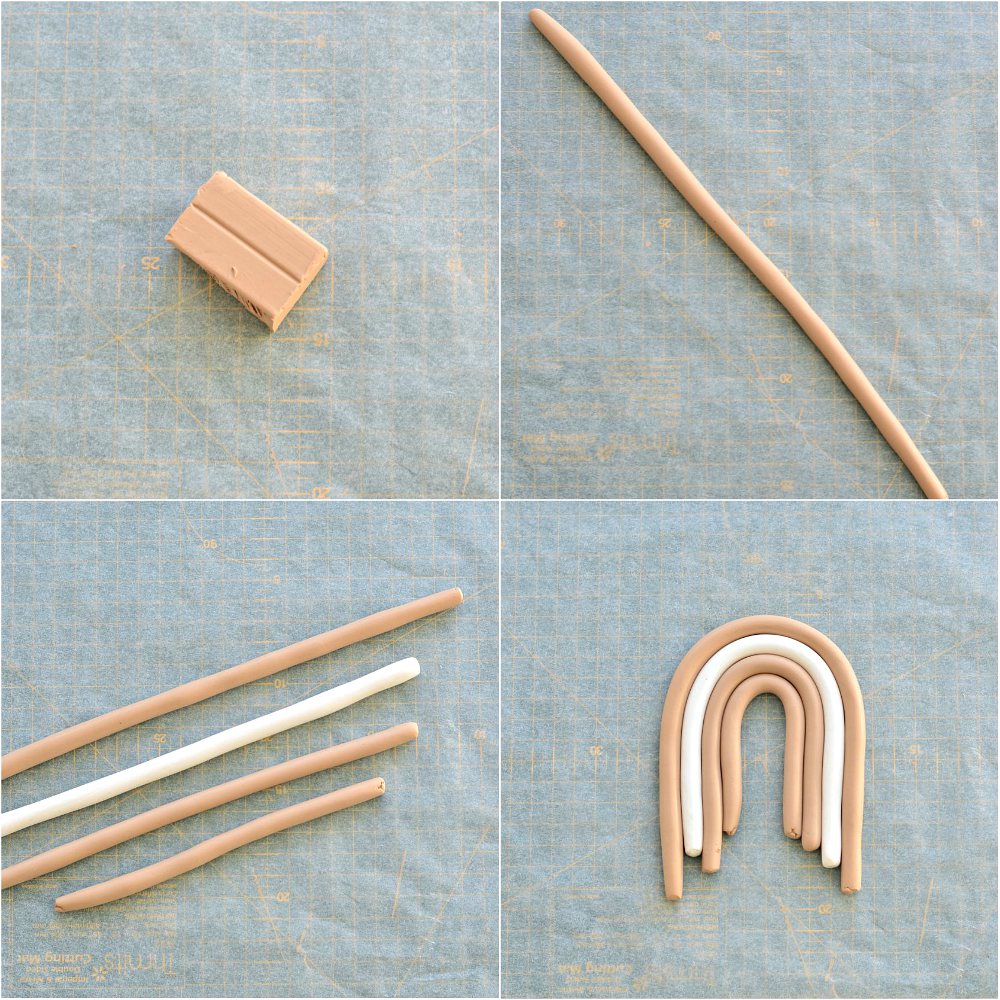
Take a large chunk of clay and roll in to a long snake like shape. Thickness should be approx 9mm (.35inch) – so it’s fairly thick. In length, the first one should be at least 23cm+ (9 inches+) – you can trim it later.
Make all four arches in this way with each one as similar in thickness as you can get it. The length will of course get a little smaller with each arch.
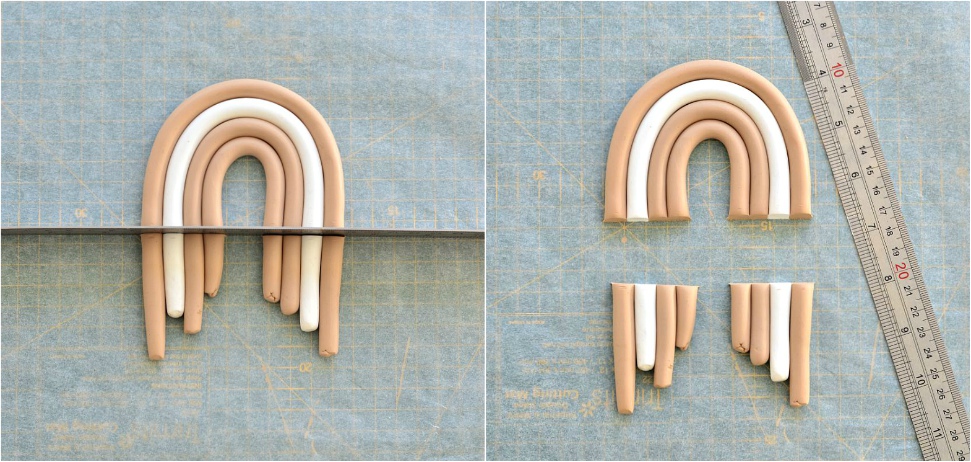
Once you’ve made all four arches, place them in a rainbow shape so that each one is touching the one above it. Once you’re happy with the shape, use a metal ruler/long sharp knife to cut the excess off as this will give you one clean cut. The trick is to cut all the arches in one go for the cleanest cut.
Bake according to instructions making sure the clay rainbows are flat on your baking try. Once baked and cooled, lightly sand the edges and any imperfections for a smooth finish.
Here’s a short video on how to make these DIY clay coasters
My final size in height is approx 8cm (3.2 inches) and the width is just over 9cms (approx 3.6 inches). Each one will be slightly different as they are of course handmade which just adds to their appeal.
Before I baked these rainbow coasters, I did wonder if they would come apart without any glue. But the good news is they don’t – no glue, nothing needed. The arches bake together and stay together perfectly.

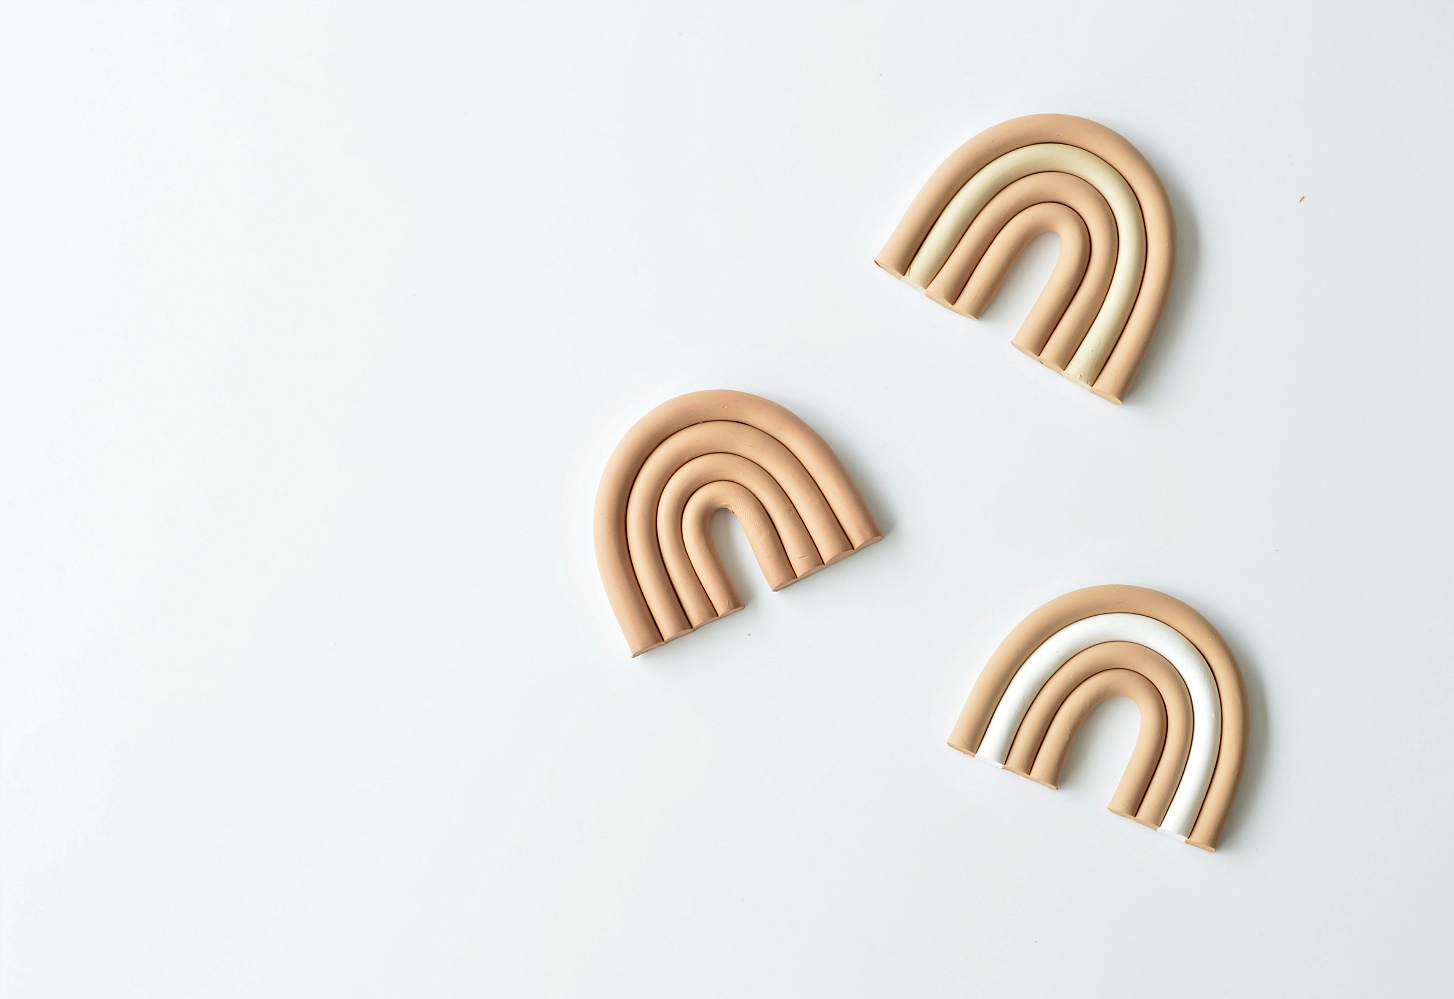

Without thinking I ended up making a set of 5 as for some strange reason coasters always come in sets of 3 or 5. But I’ll be making one more as even numbers are so much more practical. I’m planning to give a set to a friend as one of my handmade Christmas gifts. All you need is some ribbon to tie around the coasters and they’re good to gift.
Who will you make these Rainbow inspired DIY clay coasters for?

[…] is one of my own creations and I can say these DIY rainbow clay coasters are so fun to make and look so pretty too. Once again you can choose different coloured clay or […]