
A little gesture can go a long way. One of my favourite gestures is to surprise a friend with a mini bouquet of flowers. I buy one bunch and split the flowers in to three or four little bouquets (sometimes even keeping one for myself). It’s a quick and easy way to say thank you or to let a friend know they’re appreciated.
I partnered with Bloom & Wild, the letterbox flower delivery people, to bring you a tutorial on how to wrap mini bouquets. Bloom & Wild sent me their Posy Party bouquet which is a seriously cute mini bouquet of flowers, so it was perfect for dividing in to little bouquets to gift. I separated the flowers in to three bunches and wrapped them in three different ways.

Here’s how to wrap mini bouquets:
The kraft paper and twine wrap
Pick the flowers for your first mini bunch. I like to bunch together similar coloured flowers. Cut off any excess leaves from the stems. Tie your flowers using string or twine.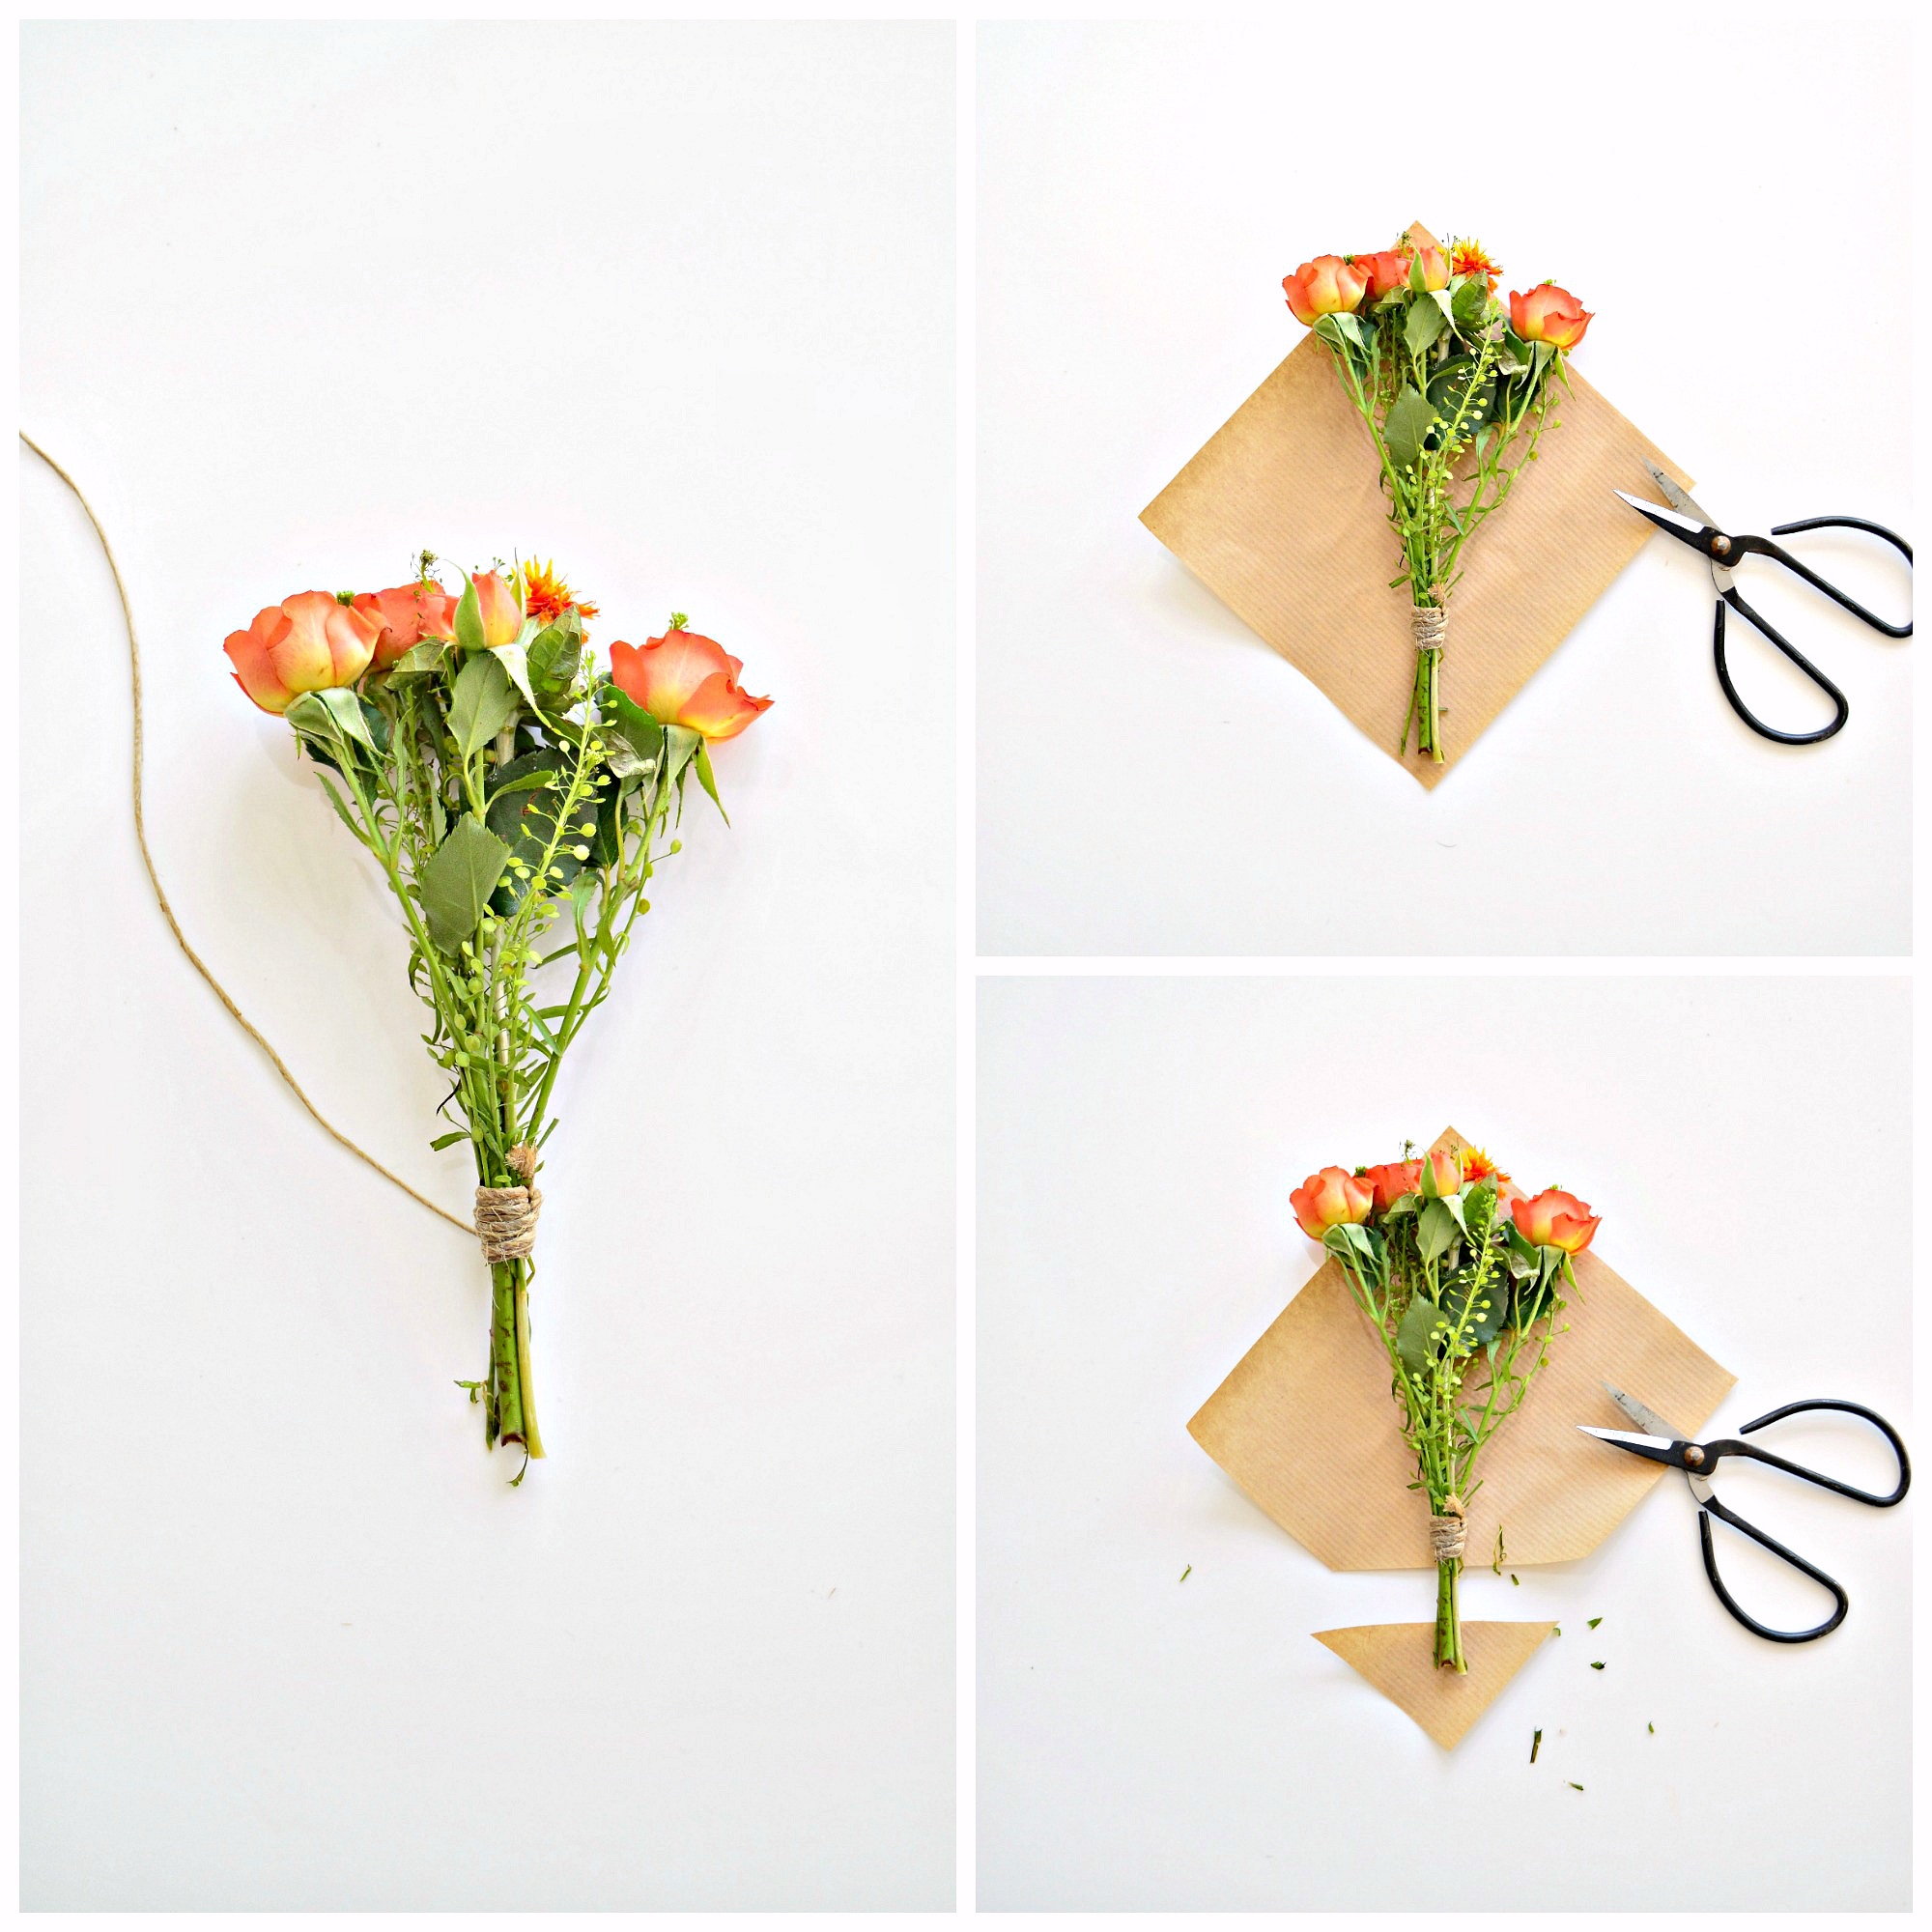 Cut a small square from kraft paper. Lay it down so that it looks more like a diamond shape and place your mini bouquet on top. Cut off the bottom end of the paper so that the flower stems stick out when wrapped.
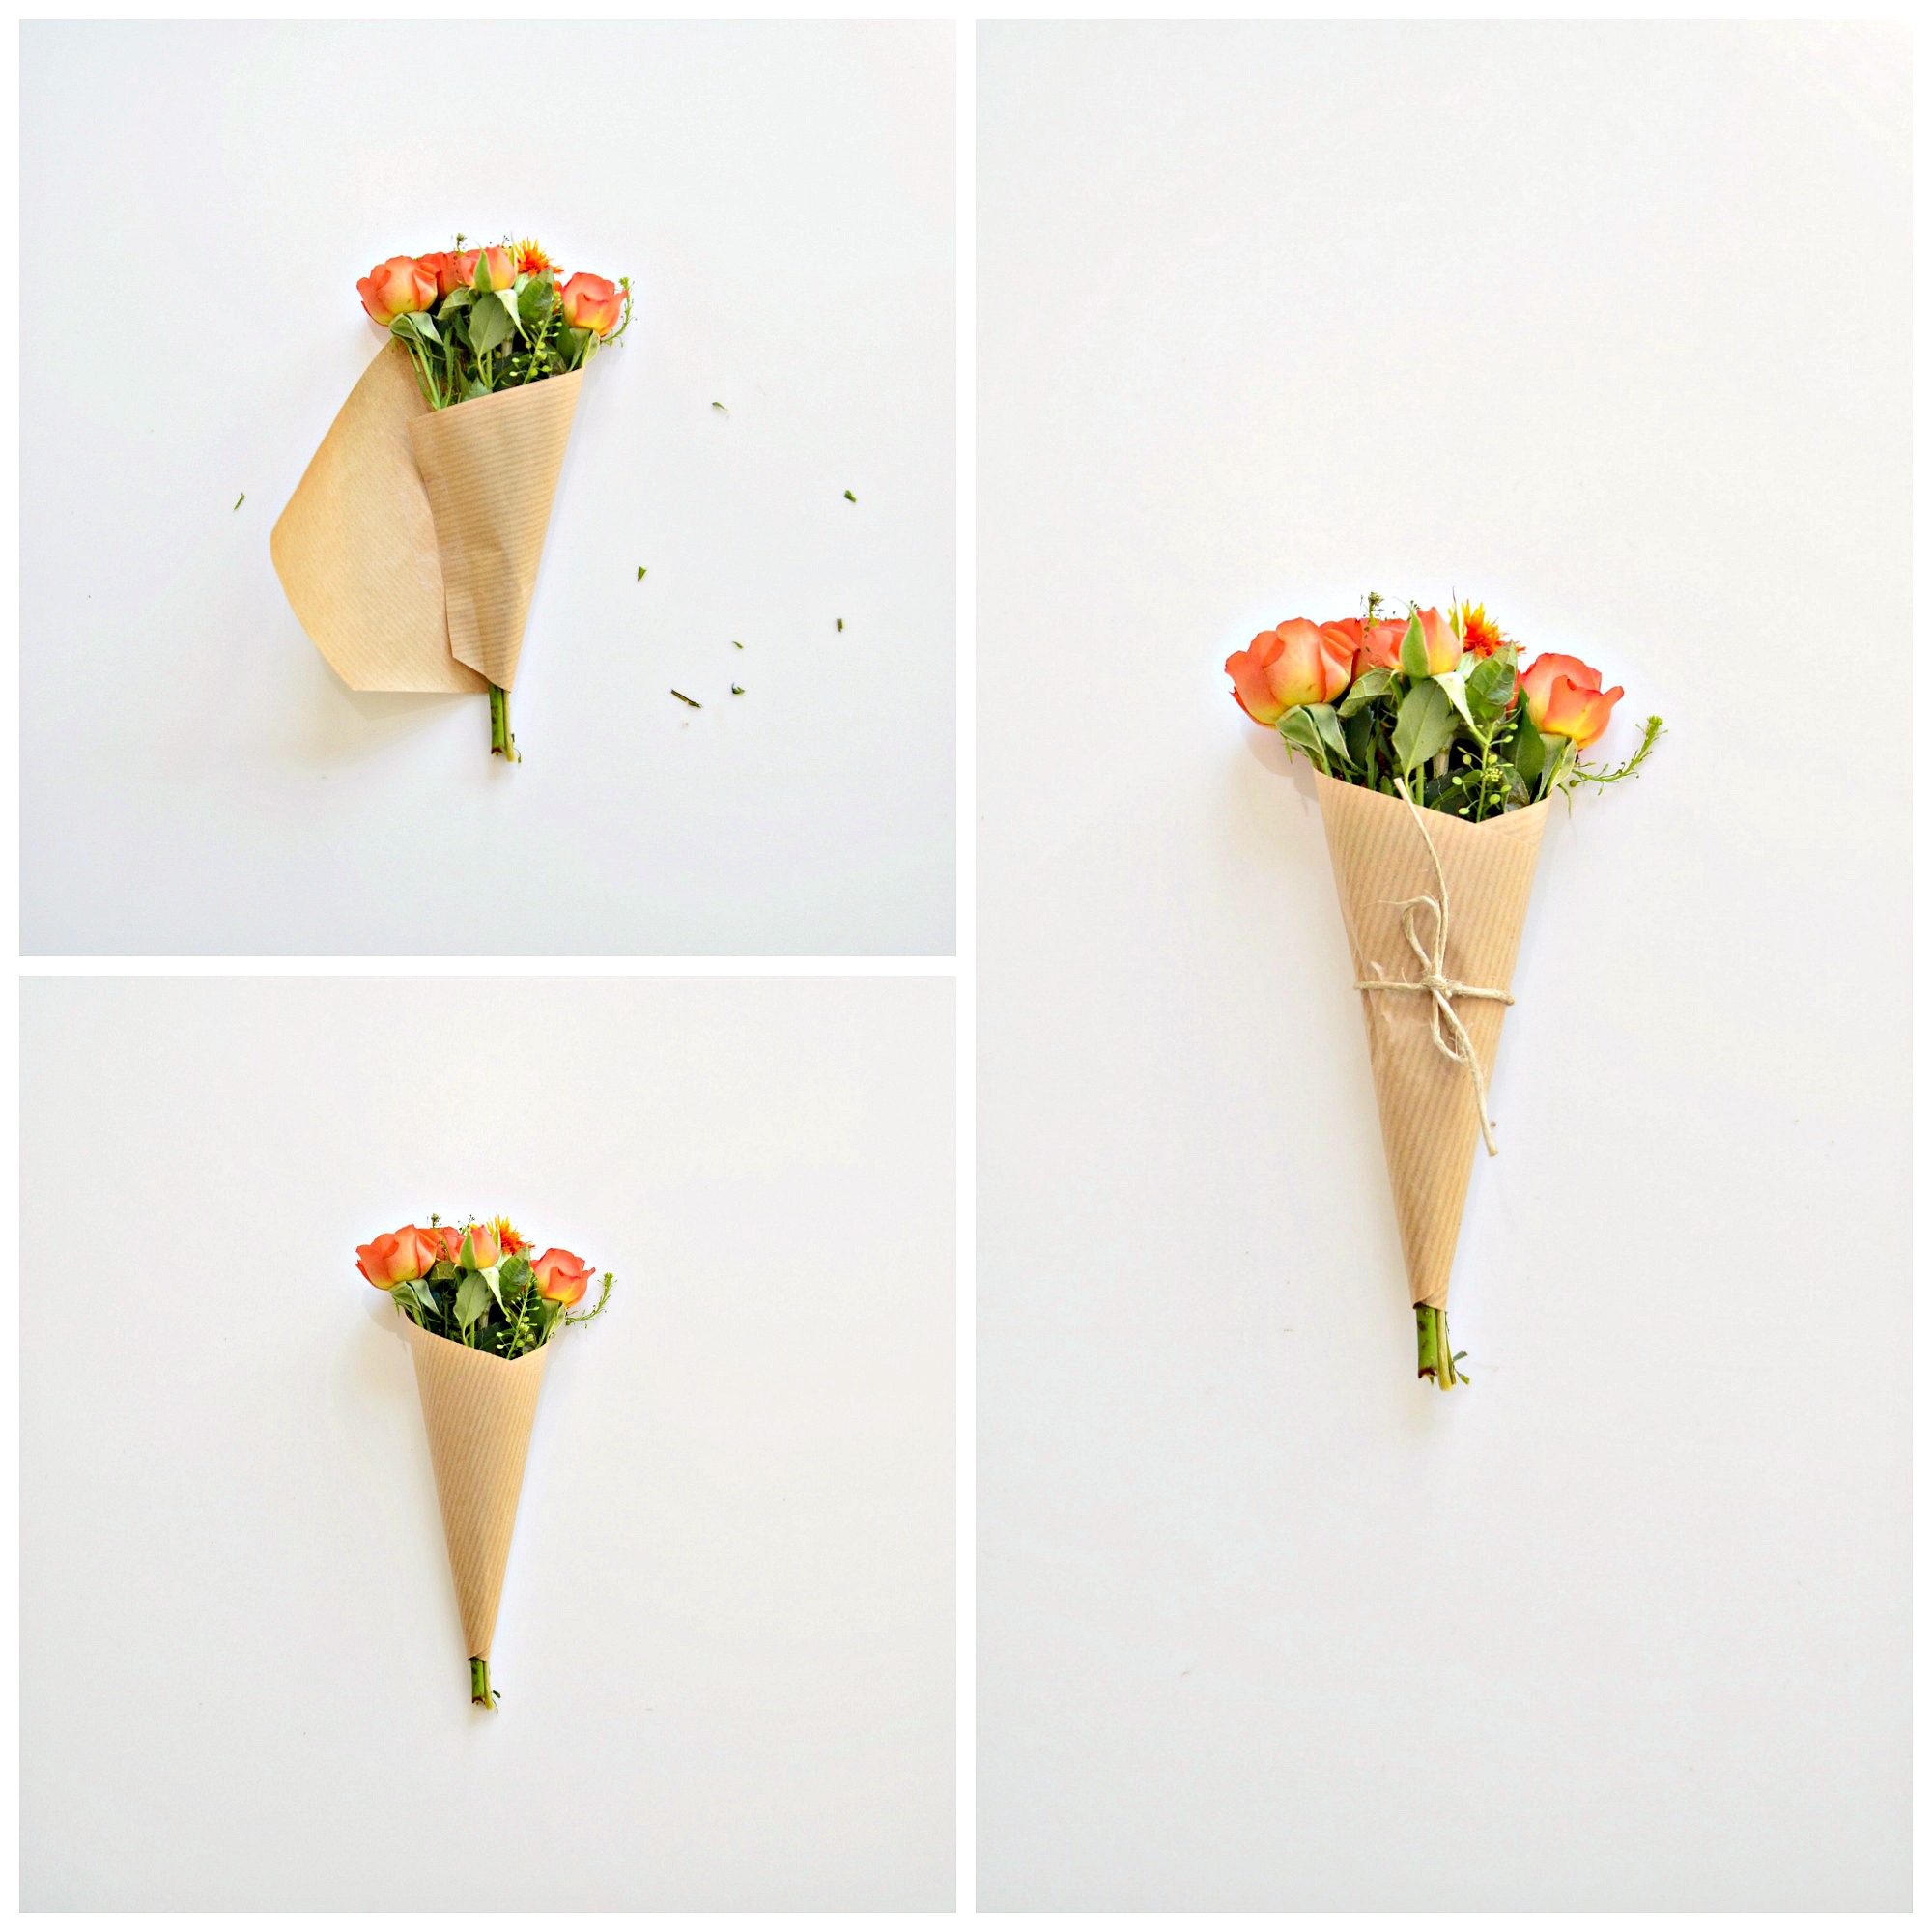 Fold and wrap right side over the flowers and tape down to hold in place. Wrap left side over the right and tape at the back with clear tape. If needed, trim the stems at the bottom so that they are all even. Finally tie a piece of twine round the middle.
The dotty wrap
Pick the flowers for your next bunch and tie them together. This time lay them down on a small piece of clear cellophane wrap. Then wrap them exactly as above.
 Once they’re wrapped, stick on some small round stickers in the colour of your choice.
The dried grass wrap
Finally, pick your third bunch and tie the flowers together. Now grab some dried grass from your garden. If your grass is all green and lush (unlike mine), then cut some and leave it to dry for a day or two.
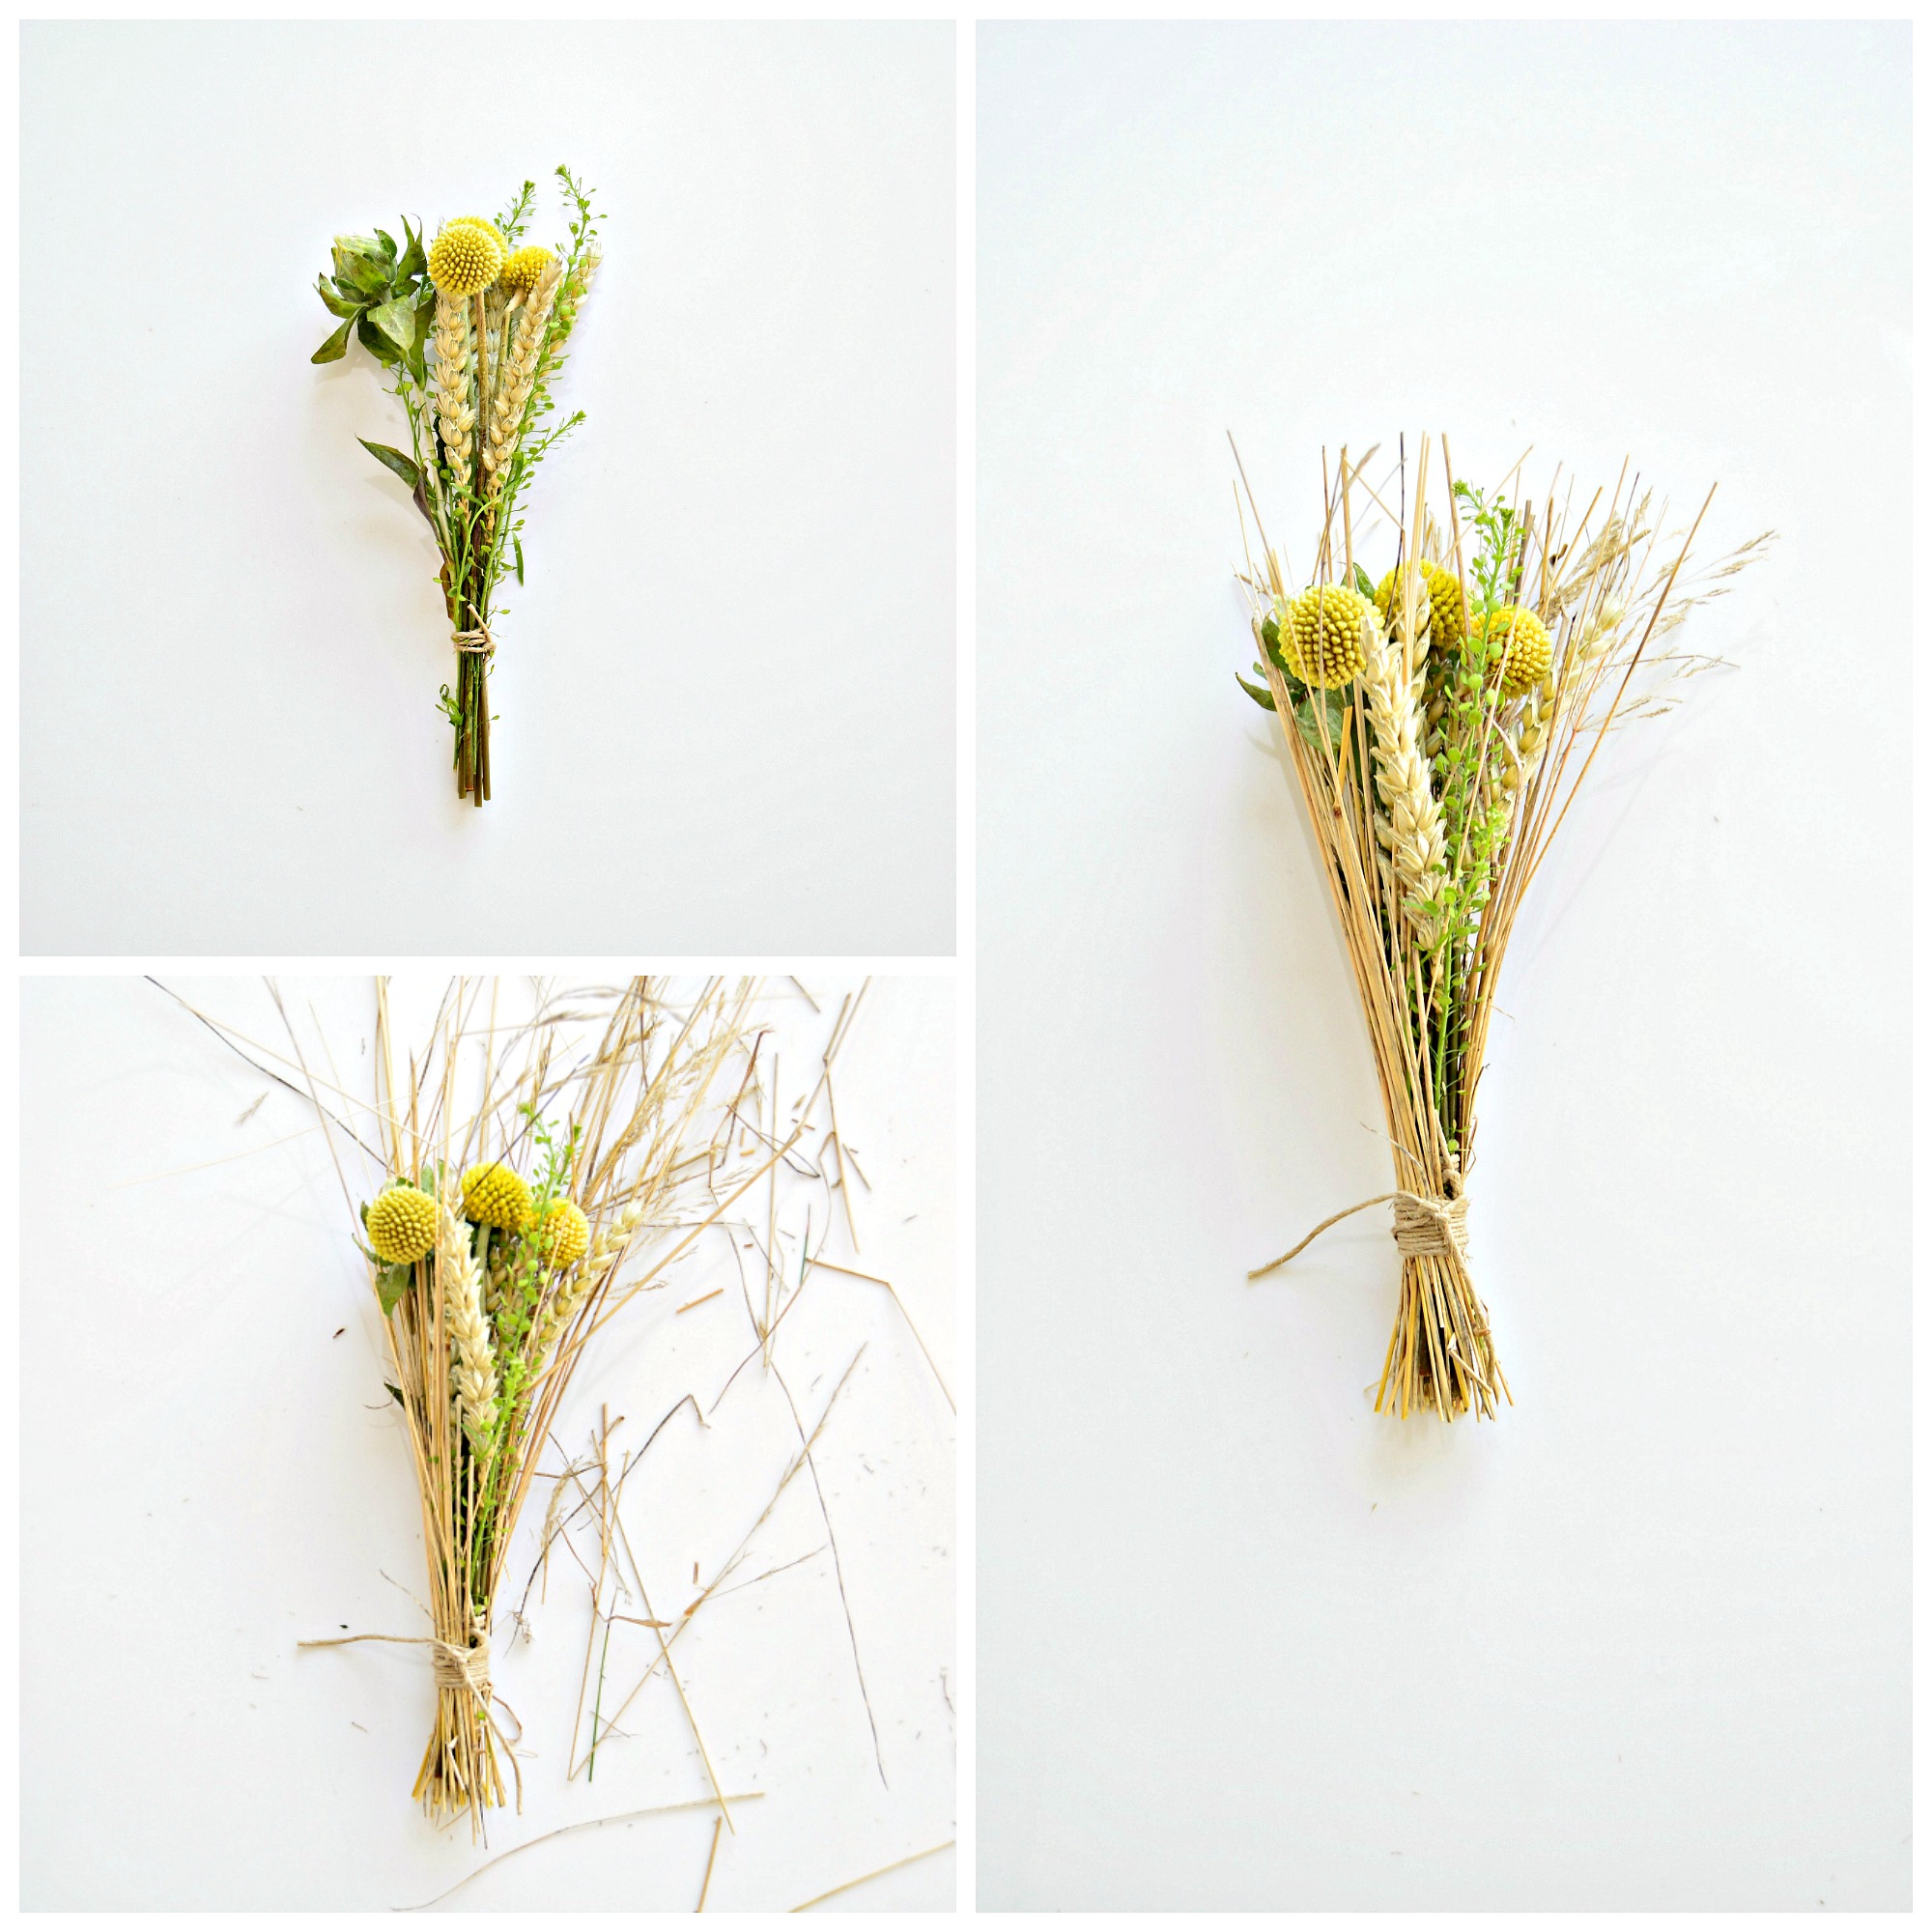 Once you’ve got your dried grass, you simply place your tied flowers in the middle of the bunch. Using more twine, wrap the dried grass around the flowers.
Now trim the ends of the grass so that the ends are the same length as the stems. Next, trim the tops to make them even but keep them a bit longer than the flowers.

Those are three of my current favourite ways to wrap mini bouquets. Do you think you’d give mini flower bouquets to your friends? Who will you make smile today?
*The flowers I used to create this post are called the Posy Party, which is a mini bouquet by Bloom & Wild who deliver flowers through your letterbox.
![]()

So this is the most beautiful post I’ve seen on the internet in the history of time. No exaggeration, utterly stunning and I’m sending it to Peter to encourage him to buy me a bouquet and I will try these mini versions with the kids. Will share this on social media too x
Aww, thank you for your lovely words. Do make them, fun to make and even more fun to give xx
I love the simplicity of brown kraft paper! It makes the bouquet a special gift without taking away from the beauty of the flowers.
Thank you Meredith – and yes I agree, brown paper is timeless and beautiful.
So sweet…yes a little bundle does to the trick…happy giving!
oops do
Thank you x