
Easter wouldn’t be Easter without some Easter egg decorating. It’s such a fun DIY to do whether you’re 8 or 80 years old.
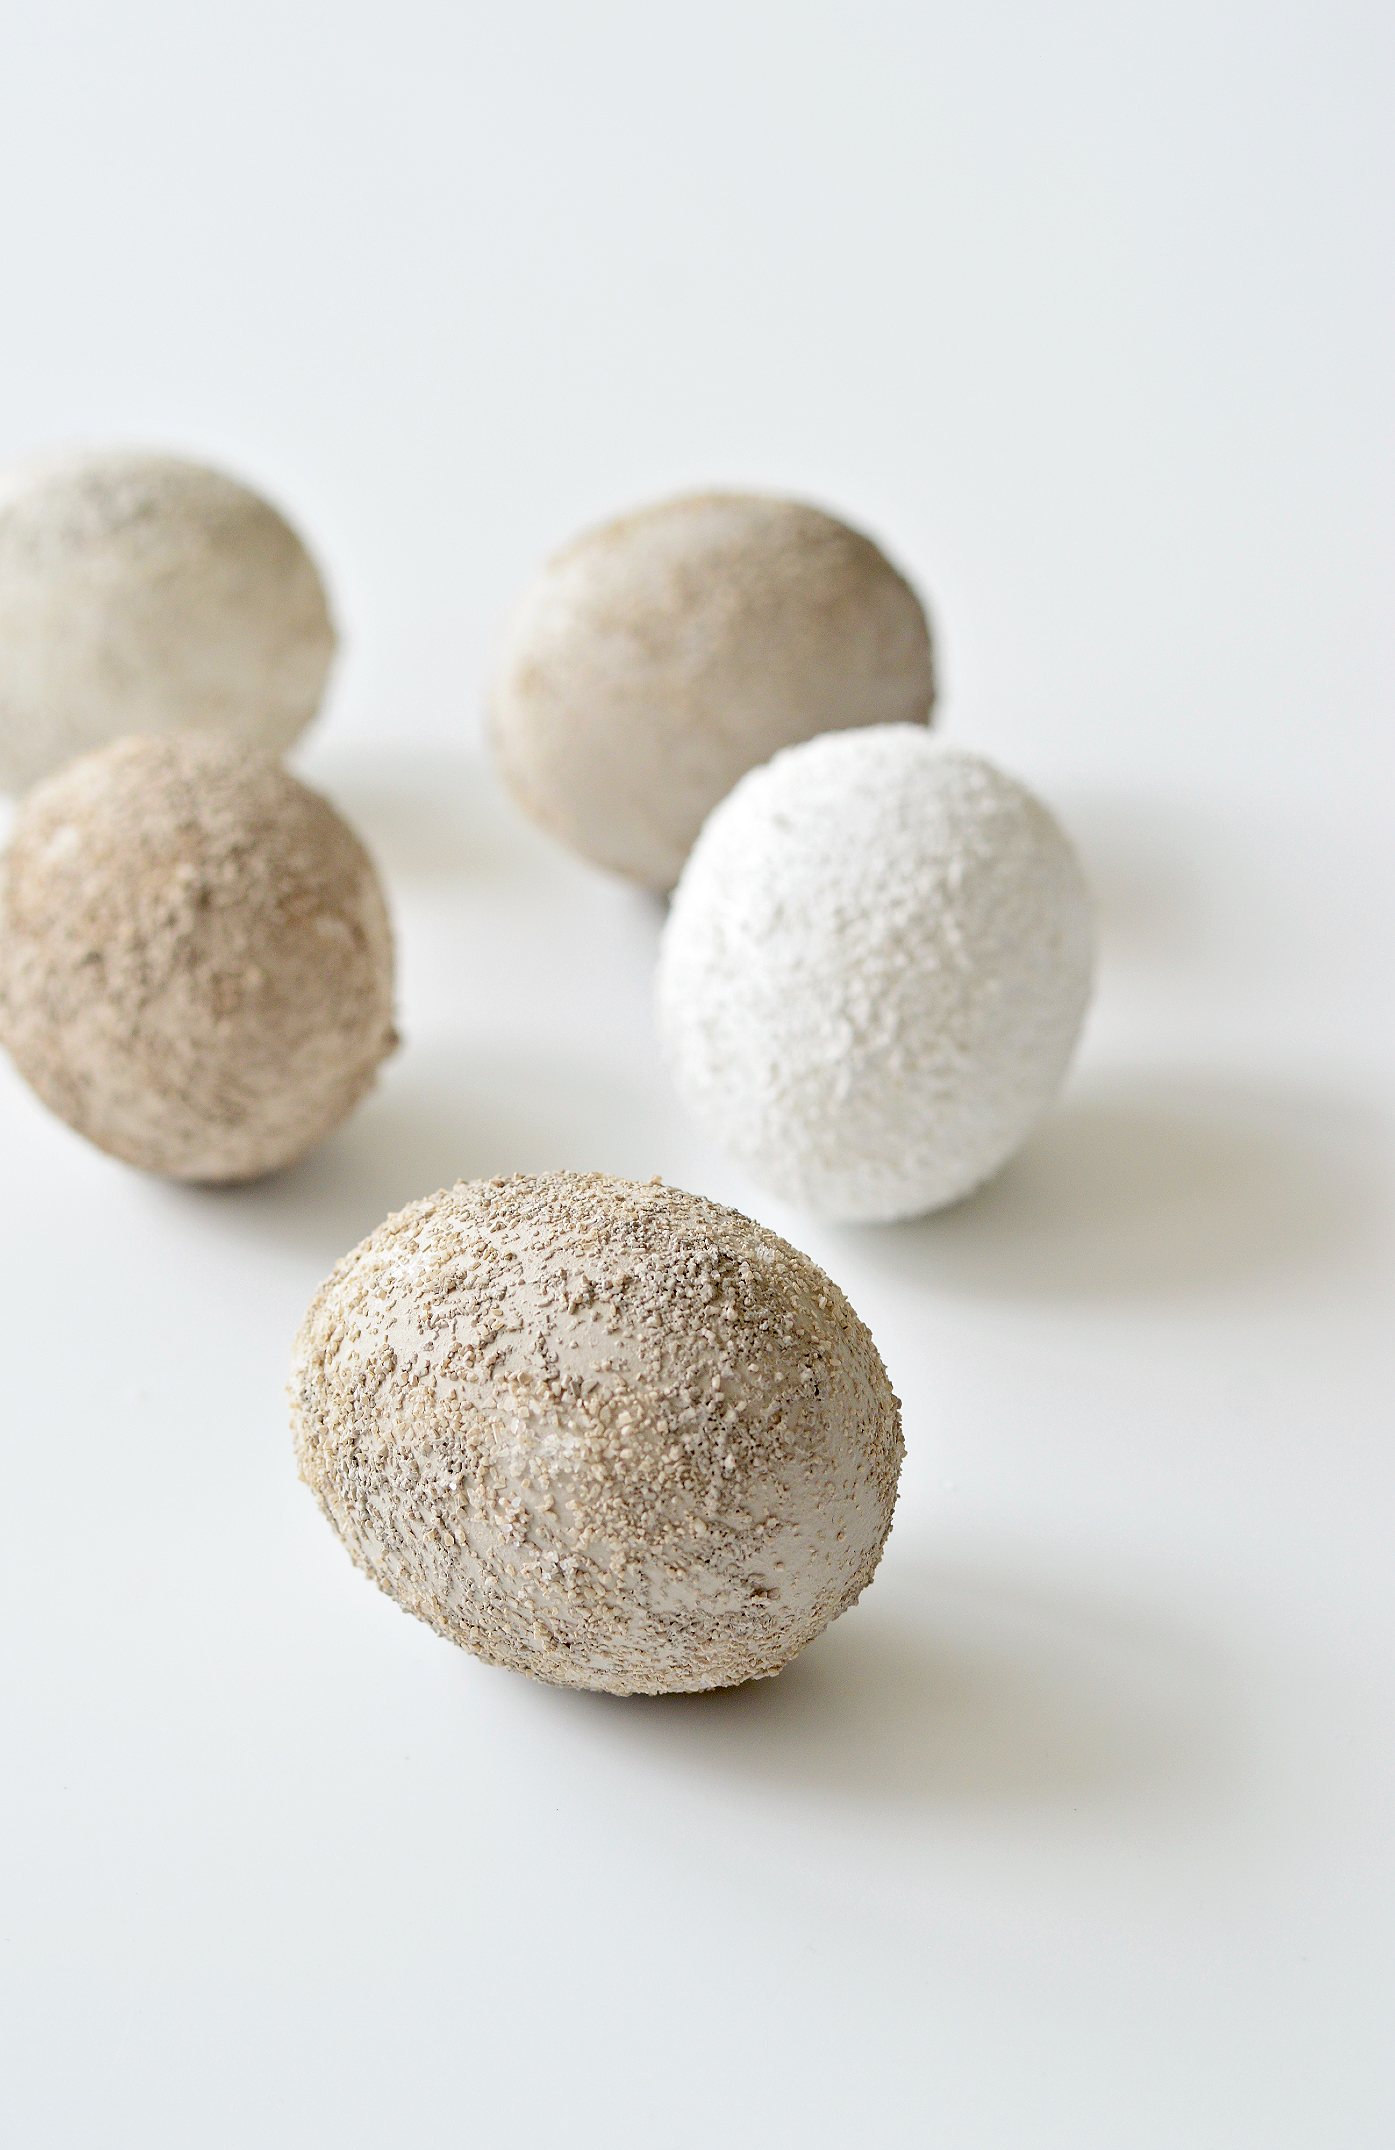
For this years Easter egg decorating idea I wanted to add texture to the eggs in some way. I experimented with a few things but finally settled on using salt – yup salt of all things! The end result are these eggs in pale neutral tones that are fun to make and display.
I can’t decide what these textured eggs look like – my husband Richard said they look like the surface of the moon! Not sure about that but I do like the natural, earthy look of them.
Textured Easter egg decorating
Materials:
eggs
interior paint sample pots*
mod podge (UK readers find it here)
fine sea salt
*I used Farrow & Balls jitney, elephants breath and skimming stone. For the white egg, I used regular acrylic paint.
Firstly either empty your eggs or hard boil them. I prefer to use hard boiled eggs as I find emptied eggs too fragile and I get grossed out at the idea of blowing out the eggs.
The one question I get asked every year is how long do you boil eggs to decorate for Easter? I boil my Easter eggs for a at least 15 minutes, even 20. No one is going to eat them so I want them to be as hard as possible. Remember to bring them to room temperature before boiling because if they’re fridge cold, they can crack.
Once ready, paint the eggs – you’ll need around 3-5 coats. Using a small paint brush, brush the mod podge all over the egg. Now dip the egg in the salt and roll it around till it’s coated as much as you want. I did some with a full coating of salt and some with a more sparse coating. Leave the eggs to sit for 15-20 minutes to let the mod podge dry and the salt to stick on.
Lightly dust off the egg – some of the loose salt will fall off. Now get your paintbrush and gently dab on the same color paint as you painted the egg. You’ll need to do one side of the egg first and allow it to dry completely and then turn and do the other side. The paint helps the salt to stick on so once painted the salt doesn’t fall off much.
Here’s a short video showing how I made the Easter eggs:
I’m planning to use these eggs as part of my Easter table decorations. Paired with white linen, white plates and some greenery, these Easter eggs will add a subtle touch of natural tone and texture. Now I need to decide what to cook!


Have you decorated some Easter eggs this year? How did you decorate yours? I’d love to hear in the comments.

These are so cool. They do look somewhat moon-like although the first thing that came to mind for some reason was dinosaur eggs! I guess that’s what living in a house of boys will do 🙂 Love your Easter crafts x
Thank you. Ha ha… don’t think I’ve ever seen dinosaur eggs! I love making Easter eggs but it’s always a challenge to create something original as there are a gazillion Easter egg decorating ideas that have already been done. x